
Danner's climbing shoes and trekking shoes that I've wanted for a long time. This time, I will go trekking on Mt. Naeba with my friends, and I am considering purchasing one. Anyway, I wanted a cool vintage Danner, so I looked it up, but it's very expensive. So I bought cheap Danner boots with worn out soles and replaced the vibram soles by myself.
- The leather on the upper was also cleaned and revived. Still usable.
- I replaced the Vibram sole and the midsole to restore the wear on the heel.
- Bought a vintage Danner with a worn out sole. Replace the sole yourself!
- Replacement vibram soles, midsoles and adhesives for trekking shoes, etc.
- Danner before sole replacement
- Peel off the sole first
- Cut replacement Vibram sole and midsole to size
- Scrape off the old adhesive on the base sole of the boot body
- Glue the midsole with diamond bond
- Finally attach the vibram sole!
- After 24 hours of drying, the soles are glued together!
- Scrape off the protruding sole
- The sole is finished. Fill the gaps with shoe goo.
- I reupholstered Danner's sole by myself! Complete!
- [Postscript 1] Used for the first time in trekking. Some soles are reattached
- [Addendum 2] The sole of the left foot, which was glued with the adhesive from the 100-yen shop, came off completely.
- [Video] I tried to replace Danner's Vibram sole by myself!
- Reference articles, reference videos
The leather on the upper was also cleaned and revived. Still usable.

On the left is maintenance, before replacement. The right is after maintenance and replacement. As a result, even if it was the first time to replace the sole, there was no practical problem and I was able to replace it. I needed tools such as an electric drill, and the work took several days. I love the boots, and I'm glad I did!
I replaced the Vibram sole and the midsole to restore the wear on the heel.

The heel was worn out, but I replaced it with a new midsole and vibram sole, and it was completely restored!

The spikes on the back of the sole are perfect.
In addition to this blog post, I also shot a video. I thought about replacing the Vibram sole myself, but there is not much information on the net, and there are many websites and blogs of sole reupholstery companies. All the records I tried by myself while referring to YouTube etc. The blog also describes failures and reflections such as "I should have done this", and describes it as more detailed information. The video recorded the entire process, so it became a long video, but I made it so that you can see the details of the work.
Bought a vintage Danner with a worn out sole. Replace the sole yourself!

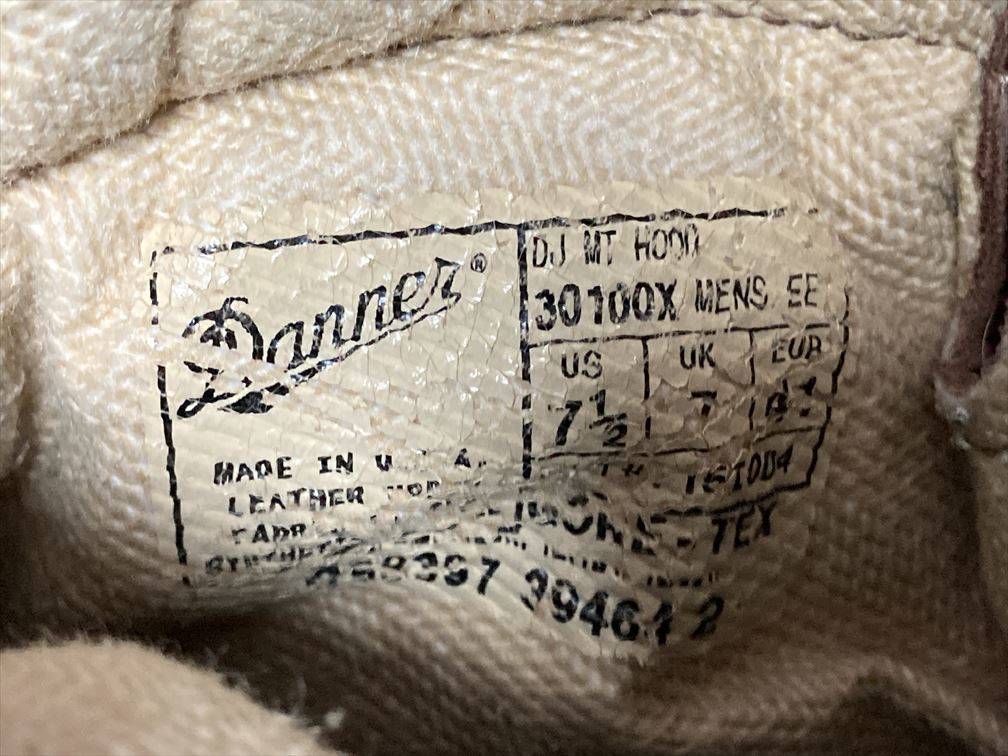
Purchased Danner mount hood and brand new replacement vibram sole.

Probably 90s-00s mount hood. I'm not familiar with Danner, but is it currently out of print? A reprint appears to have come out a few years ago. It seems that Takuya Kimura wore it in a drama, and it seems to be popular (truth unknown)

The condition of the leather is not bad, and there are no fatal wounds or pains, so it can still be used if taken care of. All hardware is included and works. The sole is worn out, so I bought it on Mercari for 9000 yen.
Replacement vibram soles, midsoles and adhesives for trekking shoes, etc.

Replacement soles and glue. Vibram sole, midsole from the left.
Purchase the replacement vibram sole on Amazon or Rakuten. Danner light is also possible.
Measure the length and width of the replacement vibram sole and purchase it. There are size charts and dimensions for each size on the Amazon and Rakuten sales pages, which can be helpful.
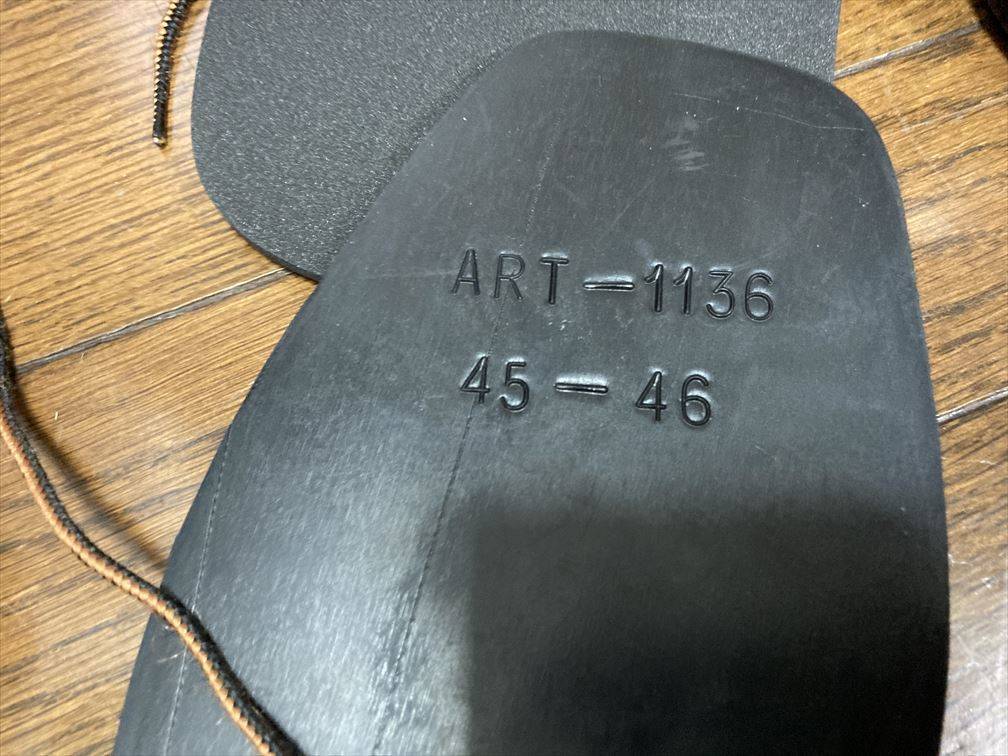
Vibram sole 1136 size 45-46 is used. In US7.5 of Danner, it is about 26cm. The replacement sole was a size 45-46. Various types of Vibram soles are sold, so it is possible to replace Danner's Mountain Light, other mountaineering shoes, trekking shoes, etc.
Midsoles are not selling well. Is it possible to make your own?
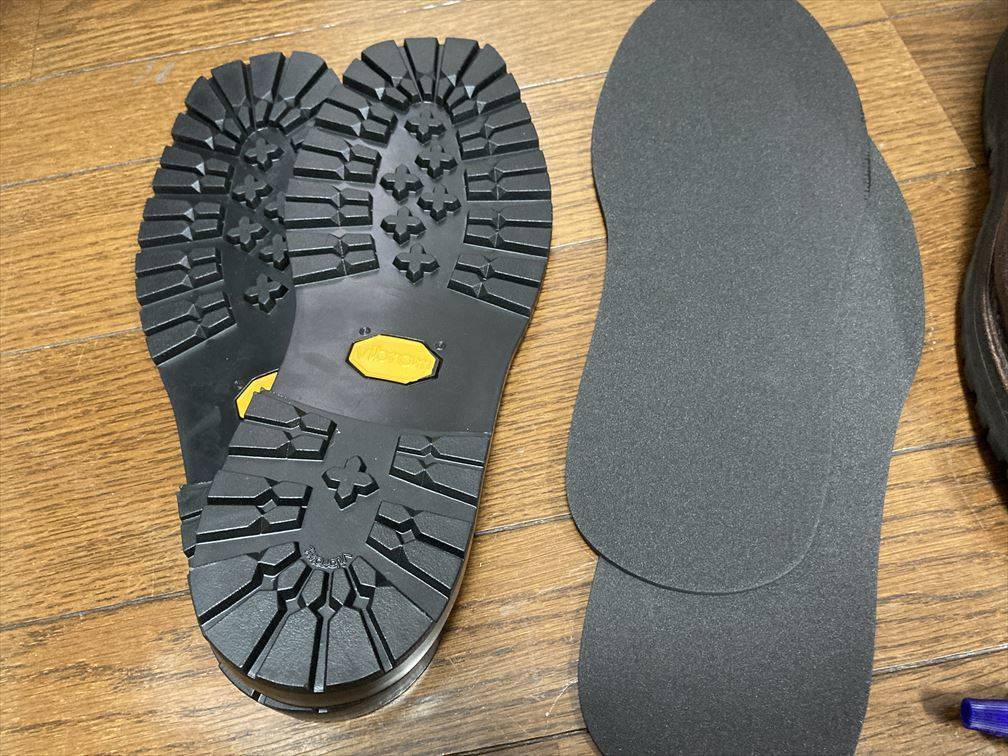
Vibram sole is a sole that hits the ground directly, called an outsole. The base sole is the sole of the boot body sewn into the leather shoe body. The midsole is made of sponge material in between. It is in the middle and softens the impact. Climbing shoes without a midsole are essential because they put a lot of strain on your feet and knees. .
I couldn't find a replacement midsole for sale. I searched Amazon and Rakuten, but I couldn't find a midsole that looked good. Purchased at a mail order site.
CORNO original EVA midsole
It has excellent low temperature characteristics and does not harden even in cold places. It also has excellent elasticity. It has a low specific gravity and is extremely lightweight compared to vinyl chloride and rubber. It does not generate dioxin when incinerated and does not contain endocrine disruptors, so it can be disposed of as burnable garbage. It is a highly durable material that does not easily deteriorate even when exposed to the elements and UV rays. We are particular about coloring and have a wide variety of color variations. The hardness is around 55 degrees, which is a little harder than a plastic eraser.
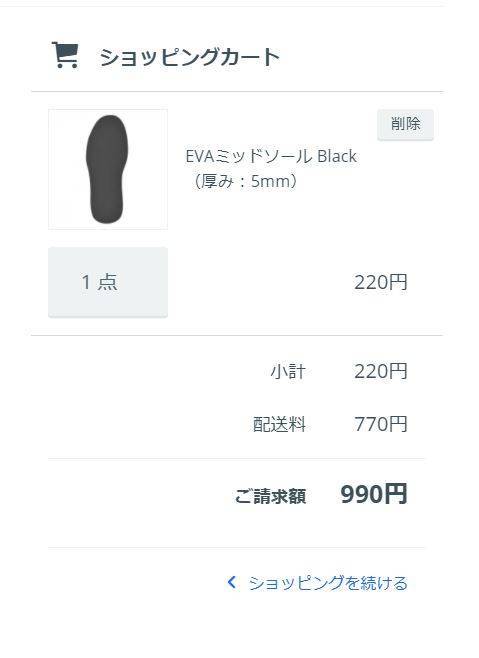
A midsole made of EVA material with a thickness of 5 mm. The thickness of the midsole attached to the original Danner Mountain Hood is about 6mm. One set is 220 yen, but since the shipping fee is courier, it costs 770 yen. I could buy Vibram soles together if they were in stock on this site, but the sole I wanted was out of stock. However, the best I could find online was Corno midsoles. No problem after actually using it! There seems to be no deterioration such as hydrolysis!
EVA material is a synthetic resin, and is an abbreviation that takes the initials of Ethylene Vinyl Acetate Copolymer. It is water-resistant, lightweight, and soft and elastic, so it is widely used as a bath mat and sole material for sandals. BIRKENSTOCK also sells sandals made entirely of EVA material. Since it does not contain chlorine, it does not generate harmful substances when burned, and is attracting attention as a material that is friendly to the global environment.
The Vibram sole attached to the original Danner Mountain Hood had no thickness in the heel part, and the midsole had a thickness in the heel. Since the midsole is flat this time, I used a Vibram sole with a high heel as a replacement.
Diabond is required for the adhesive. Shoe adhesives from 100-yen shops are not acceptable.
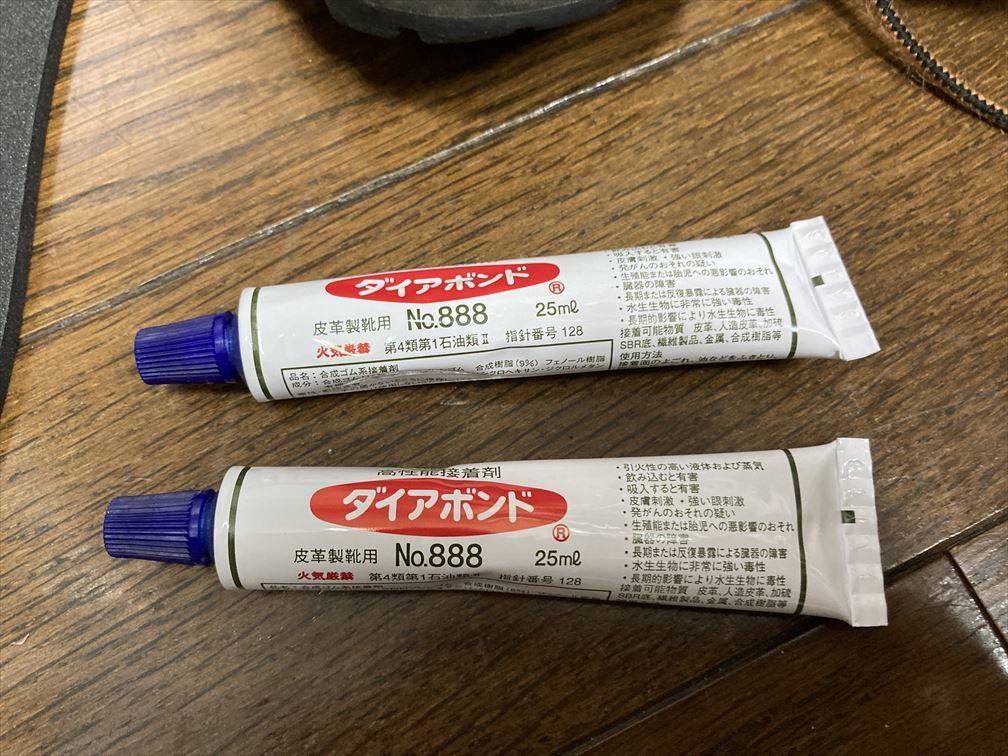
The adhesive used is DIABOND. Commercial bond used by shoe repair companies. 25 ml is about 500 yen. It is also sold on Amazon and Rakuten. Diabond is an adhesive that is applied and crimped after a while. Note that there is no adhesive strength even if it is glued before it dries like ordinary wood glue.
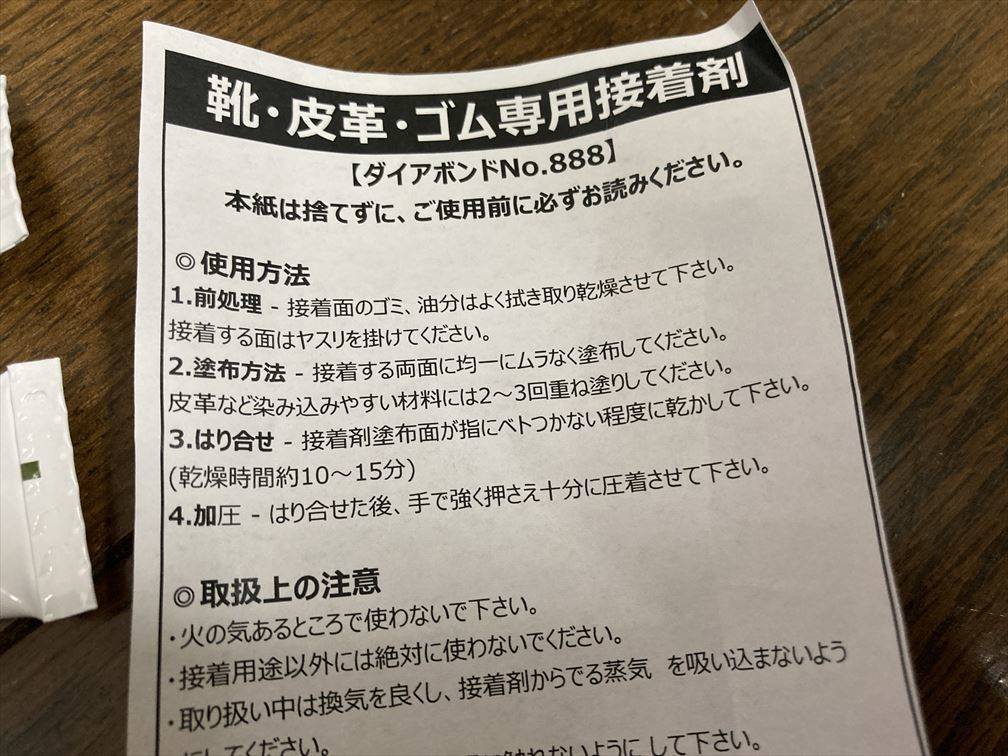
When I actually tried it, it was surprisingly difficult to stretch it flat. Double coating is very important, so I will definitely do it even if it is troublesome. It seems that primer (paint for undercoat) is often applied, but this time I did not use it. I read the instruction manual for Diabond but it doesn't say anything about primer, so it might be better to use it, but I decided not to apply primer.
Danner before sole replacement

Danner boots before reupholstery.

The Vibram sole is pretty worn.
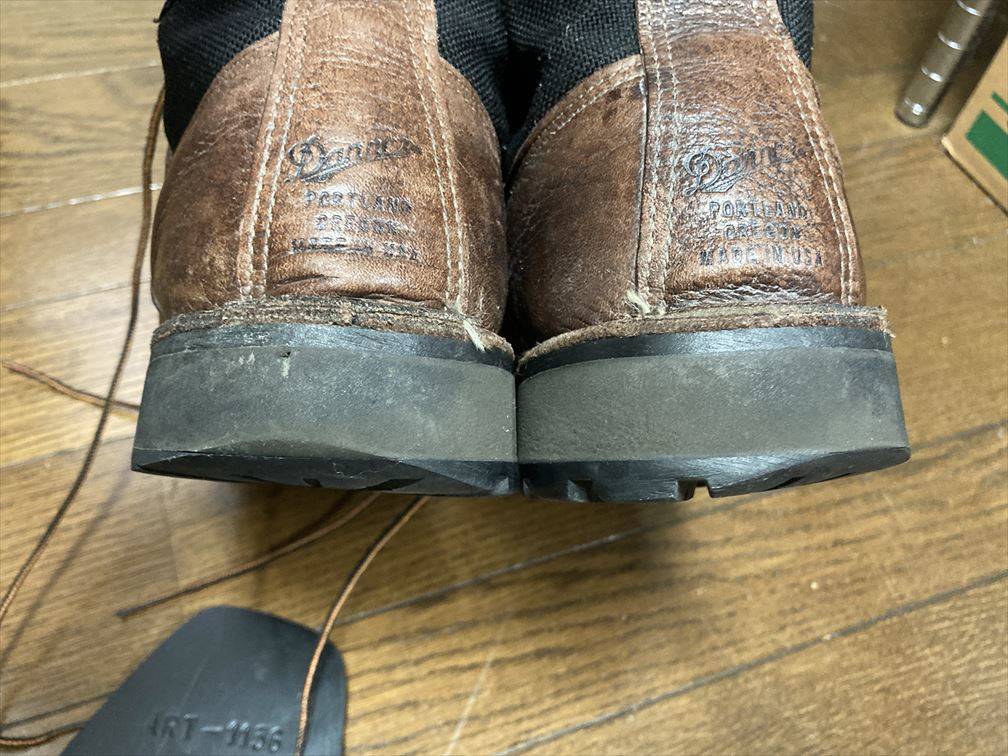
The heel has been cut considerably, and the midsole has been cut.
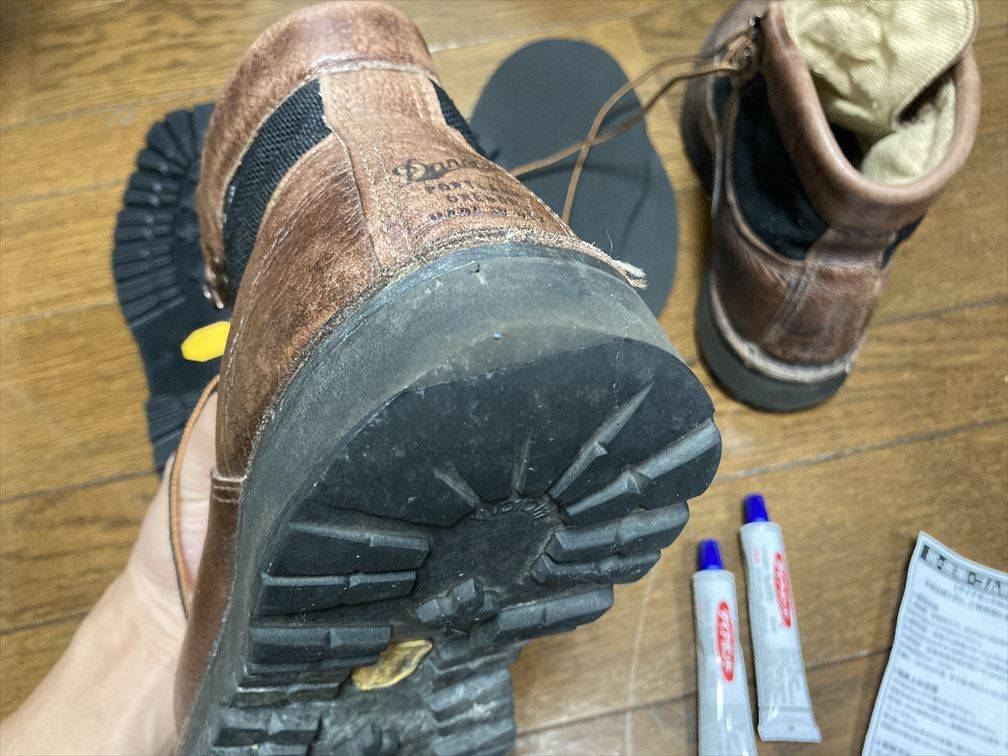
It is troublesome to replace the midsole, but it is troublesome to scrape it so badly, and the old midsole is prone to hydrolysis, so this time I replaced all the soles.

The difference is clear when placed side by side with the new Vibram sole.
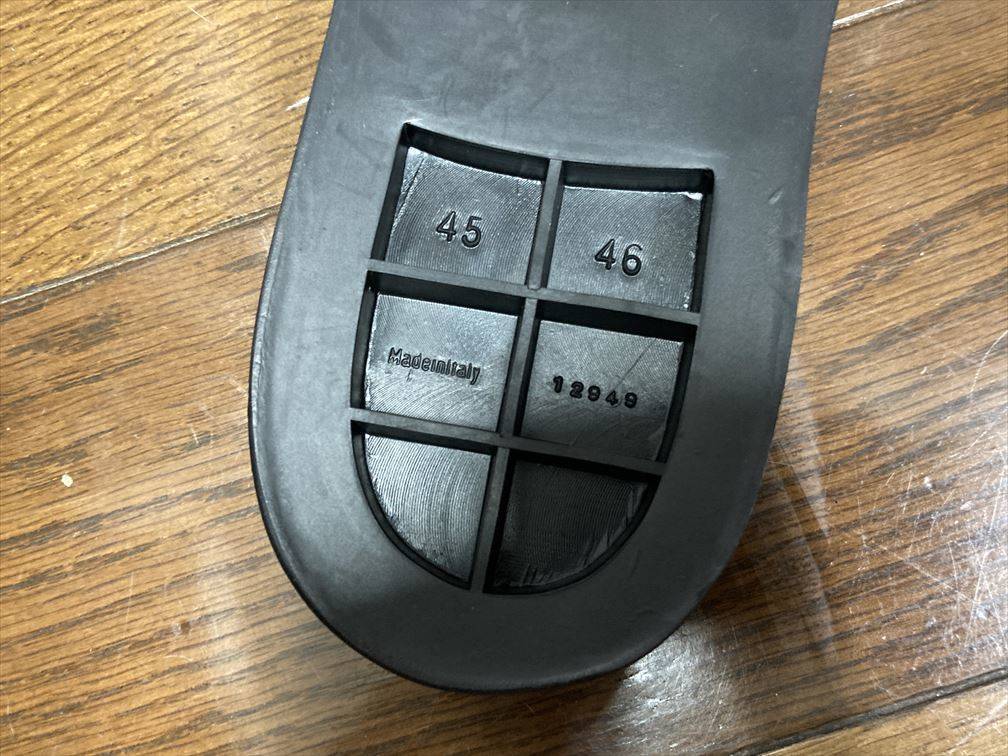
The Vibram sole has a hollow heel.
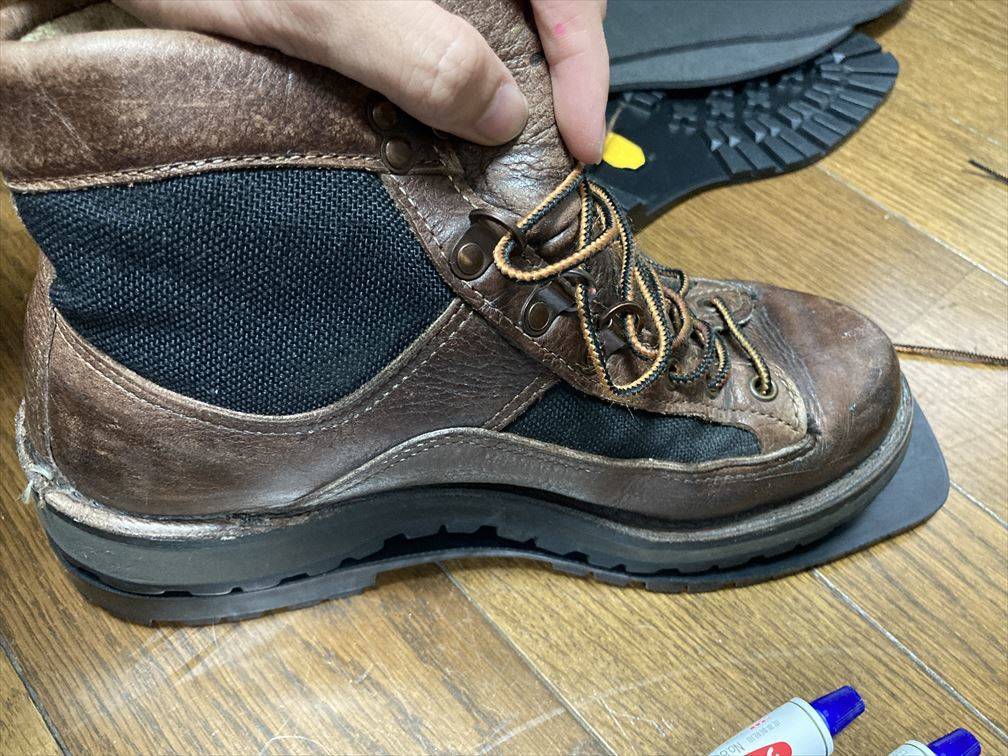
I didn't cut it and tried to fit it. It is made one size larger and can be used to replace the soles of almost all shoes and boots, not just Danner.
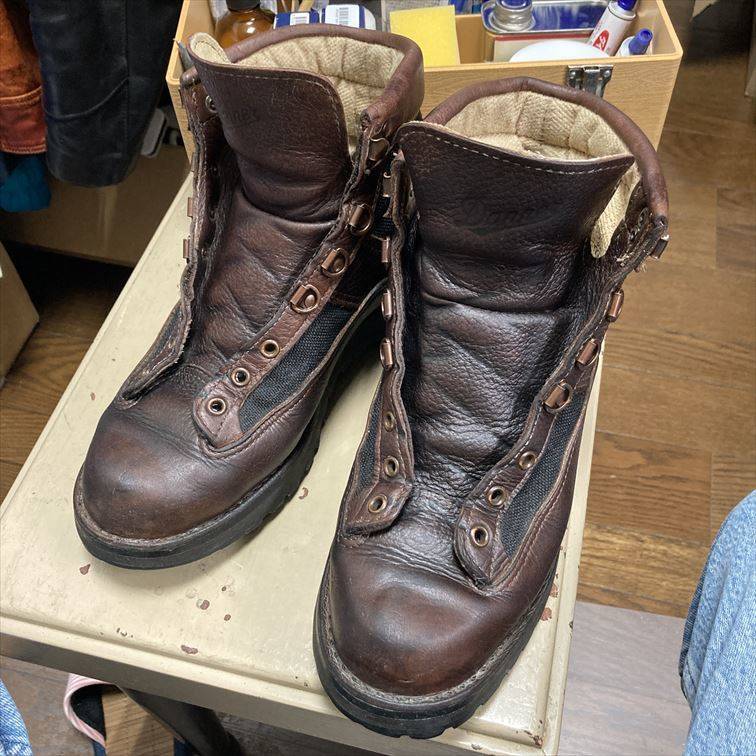
First of all, I took care of the leather of the upper. The leather is in good condition and has not dried up or cracked, so it can still be used!
Peel off the sole first
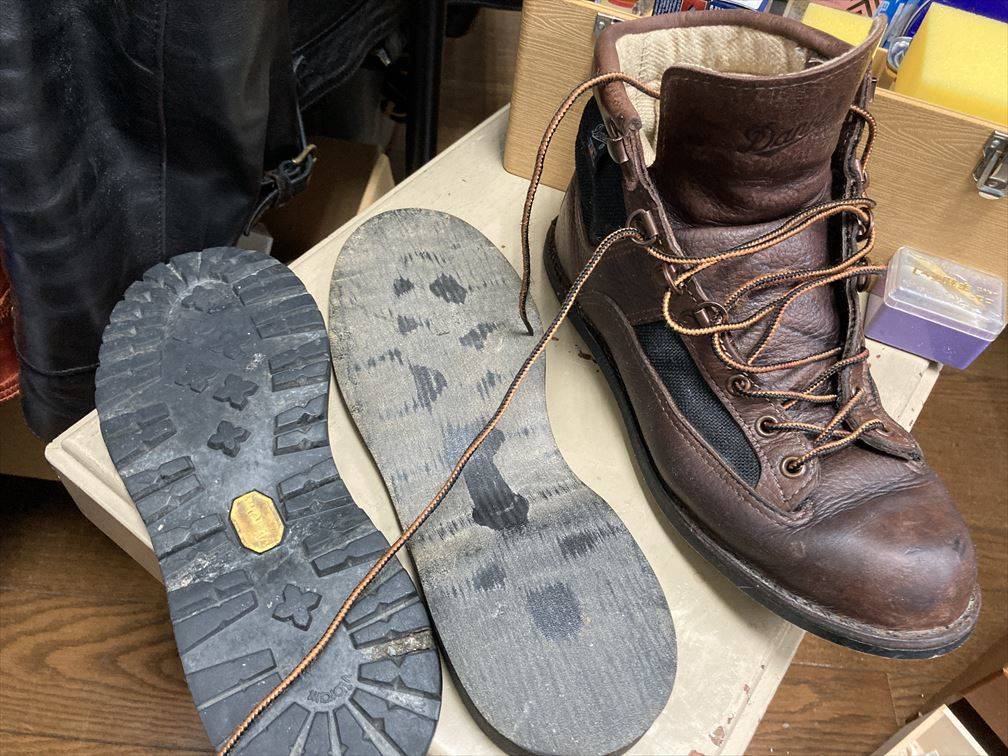
The vibram sole and midsole were removed.
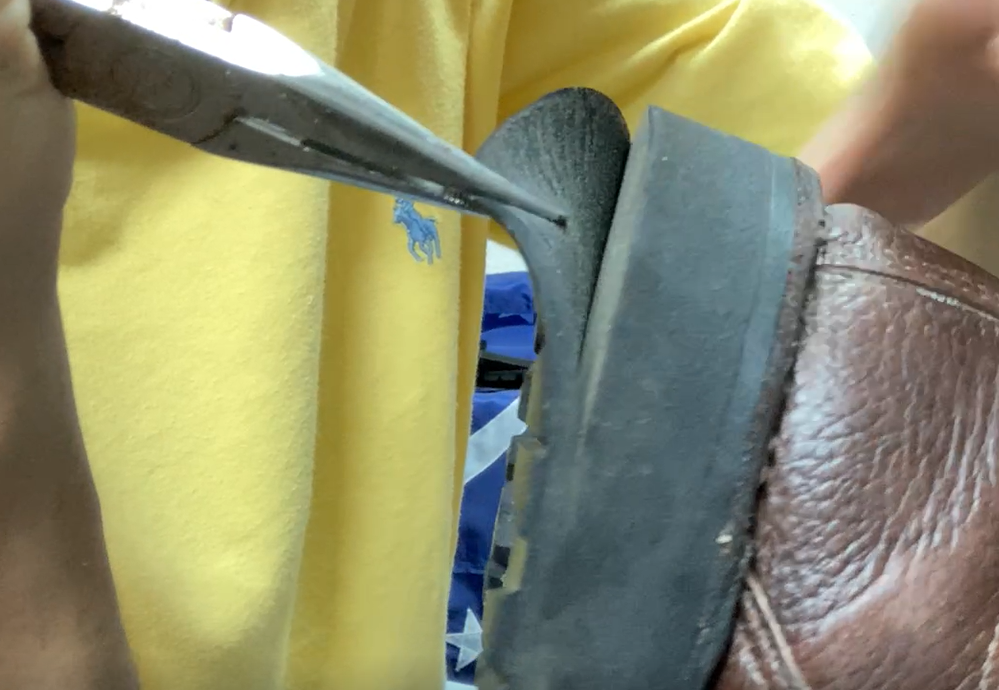
Forcibly peel off with radio pliers.
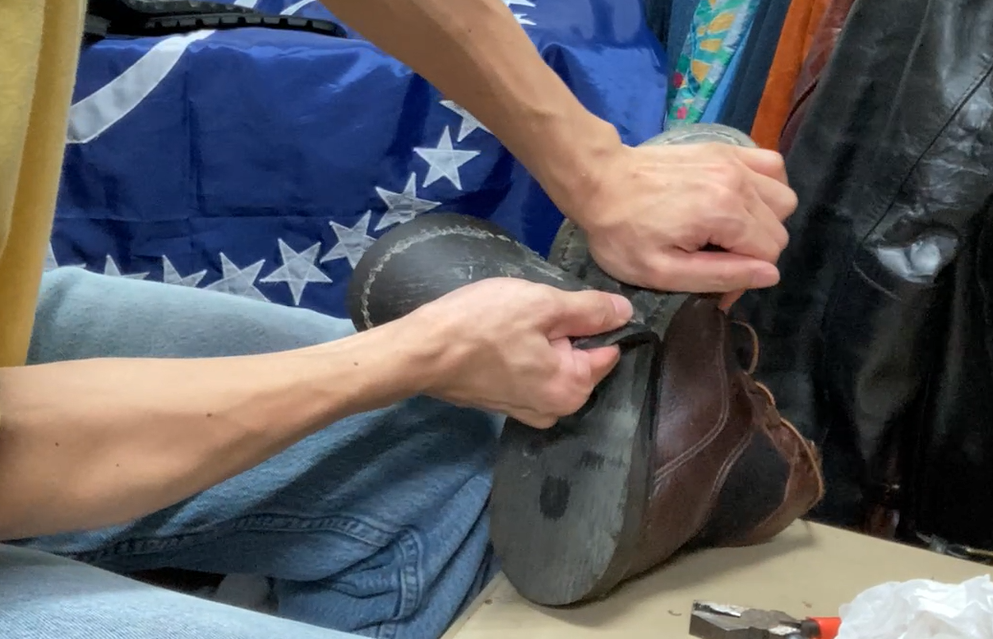
The Vibram sole peeled off fairly easily, but the midsole was quite hard and I managed to peel it off with almost my whole body strength. If possible, it might be easier to have someone put it on and pull it with pliers with all your might, or vice versa to remove the midsole. It required a lot of strength. As expected of Danner, I felt that it was quite an adhesion.
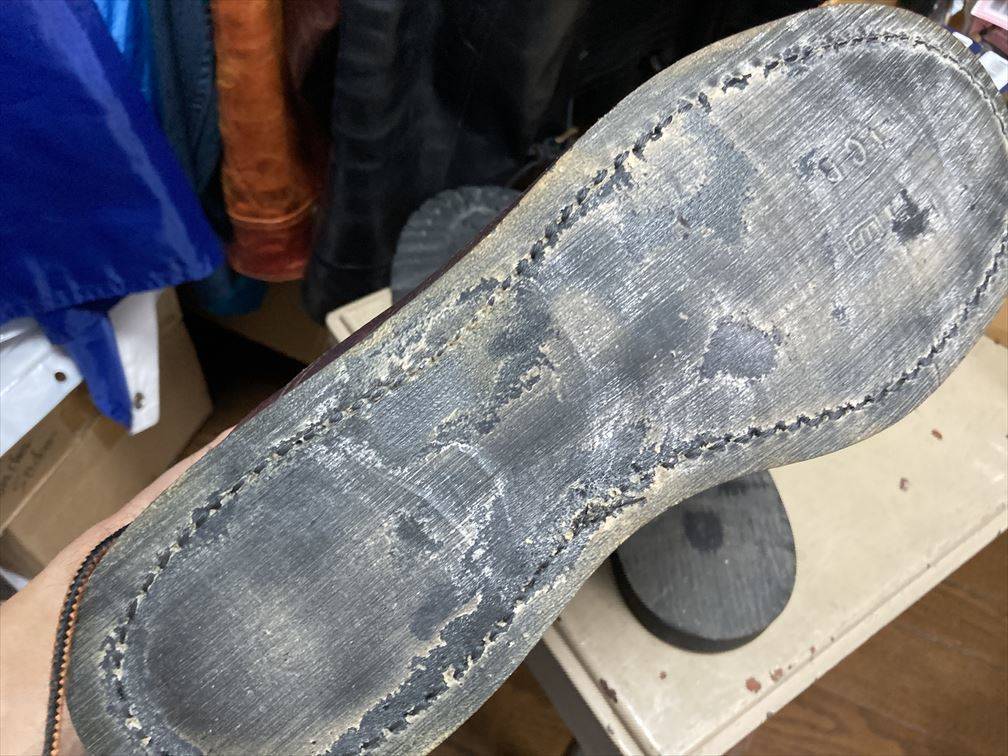
Base sole on the side of the boot body. Remains of primer (adhesive undercoat) and old adhesive.
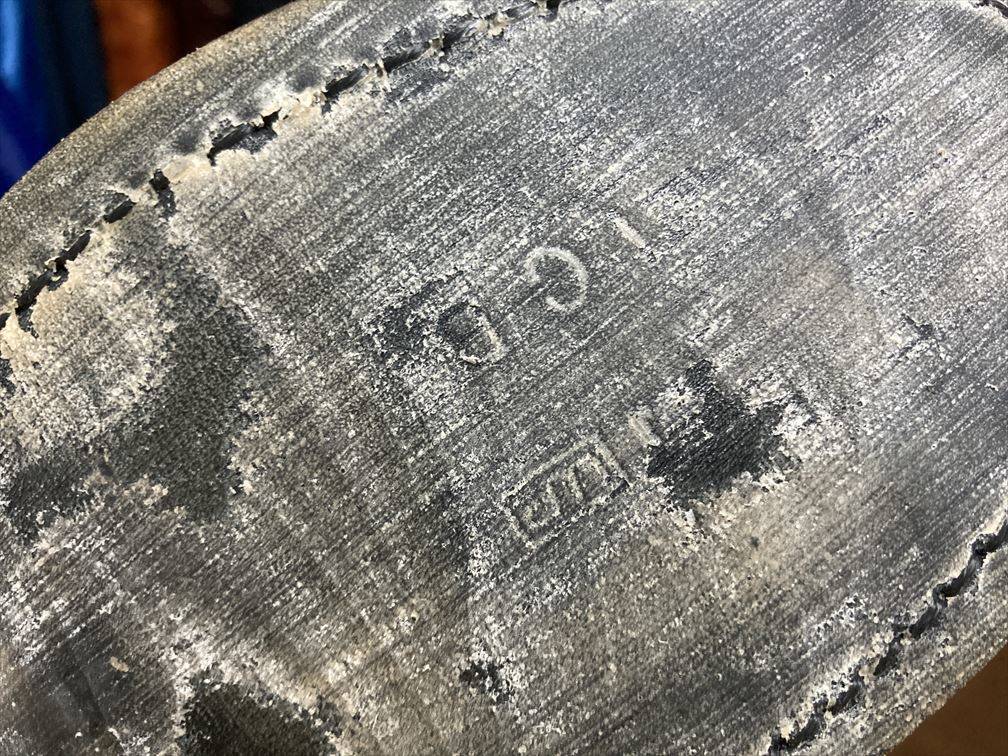
There was a stamp on the genuine Danner base sole.
Cut replacement Vibram sole and midsole to size

Make a mold using the removed vibram sole. Although it is rubber, it is quite hard, so I cut it with large scissors. Using a cutter or knife would be quite a difficult task, so we recommend using large scissors such as pruning shears.
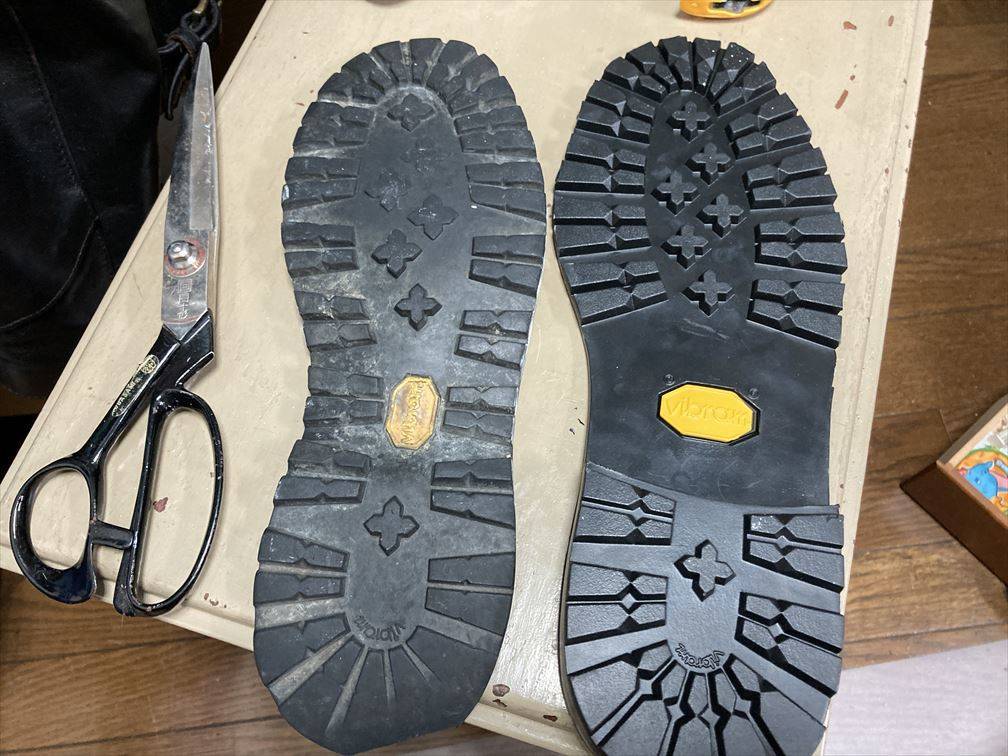
At this time, it is better not to cut it too close to the size. This is because if there is even a slight misalignment at the time of gluing, it cannot be corrected. On the other hand, it is difficult to cut after gluing, so it may be better to cut it about 2 times larger in advance.
Scrape off the old adhesive on the base sole of the boot body
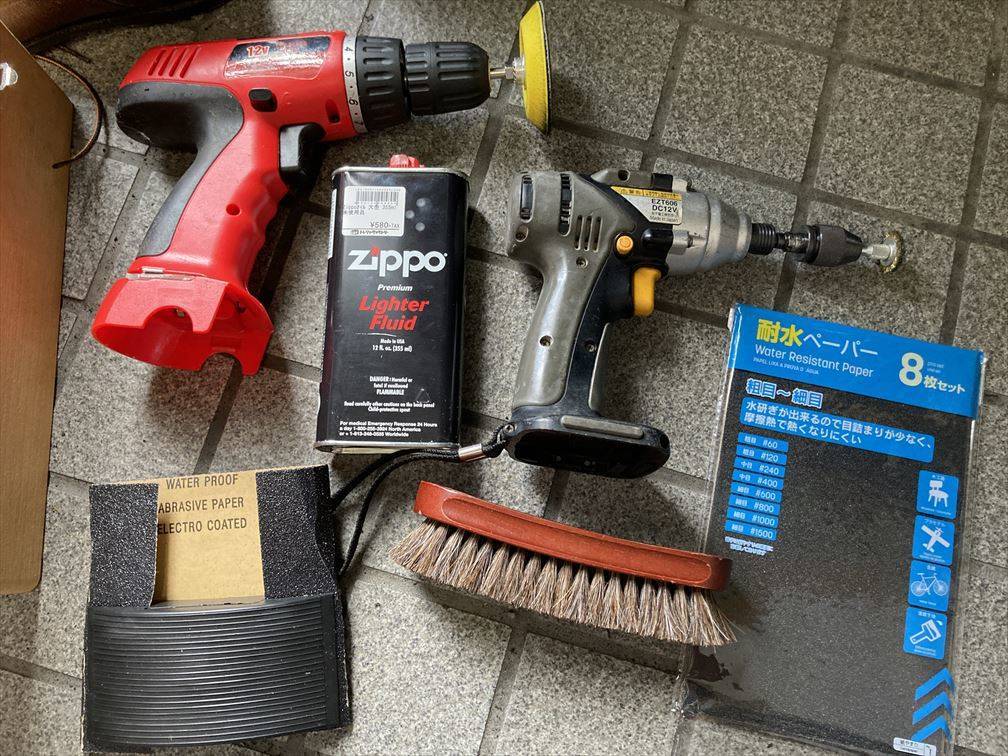
Remove any remaining adhesive on the body side of Danner's boot. This work is troublesome, but it is an important process because it will affect the adhesion of the new sole if it is not done. I also used zippo oil to dissolve the glue, but it didn't help much. It's better to have a brush because there's a lot of dust and dregs. Outdoor work recommended.
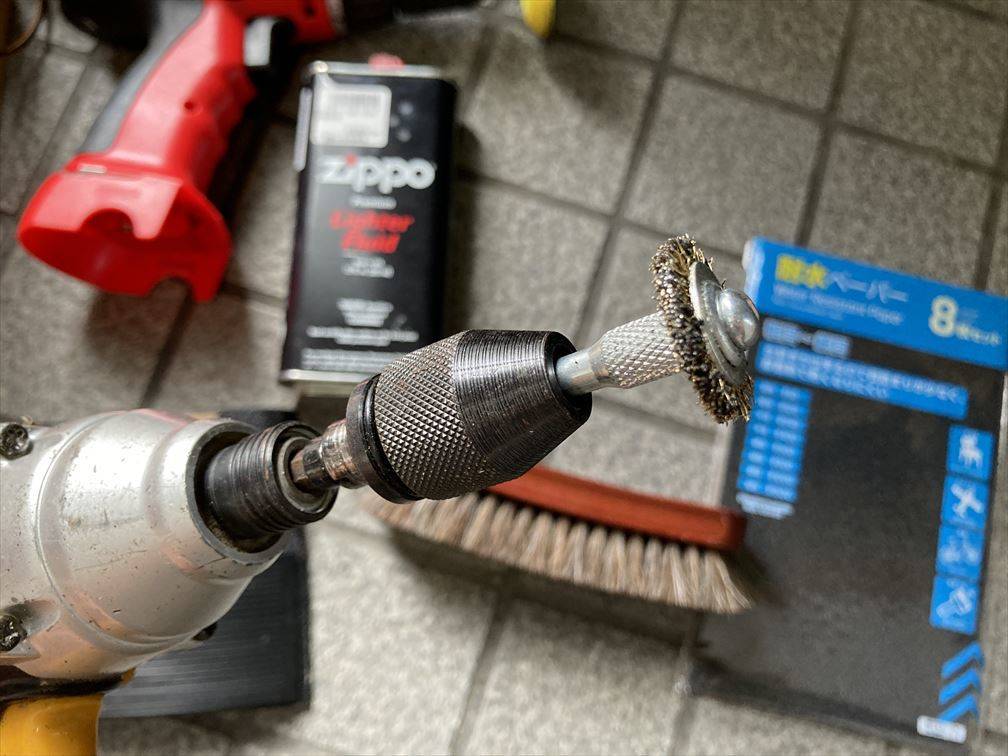
First, I tried scraping off large chunks of glue with a metal brush, but that didn't work. On the contrary, a lot of adhesive dust stuck to the brush, and it became unusable because it could not be removed.
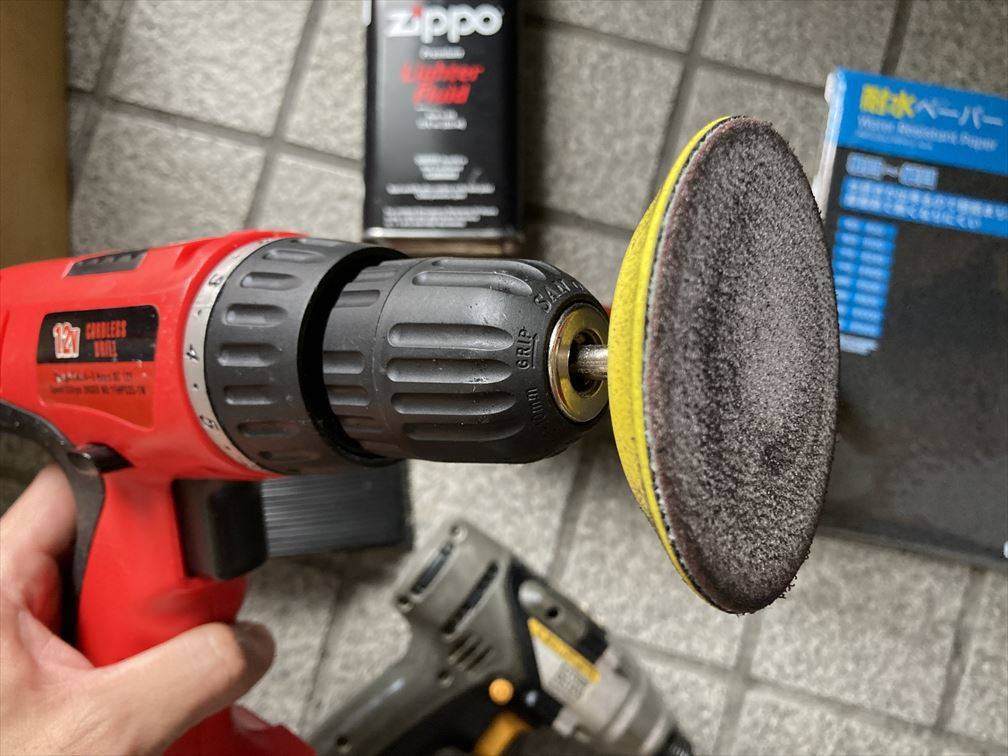
In the end, it was convenient to use an adapter that attaches sandpaper purchased on Amazon to an electric drill.
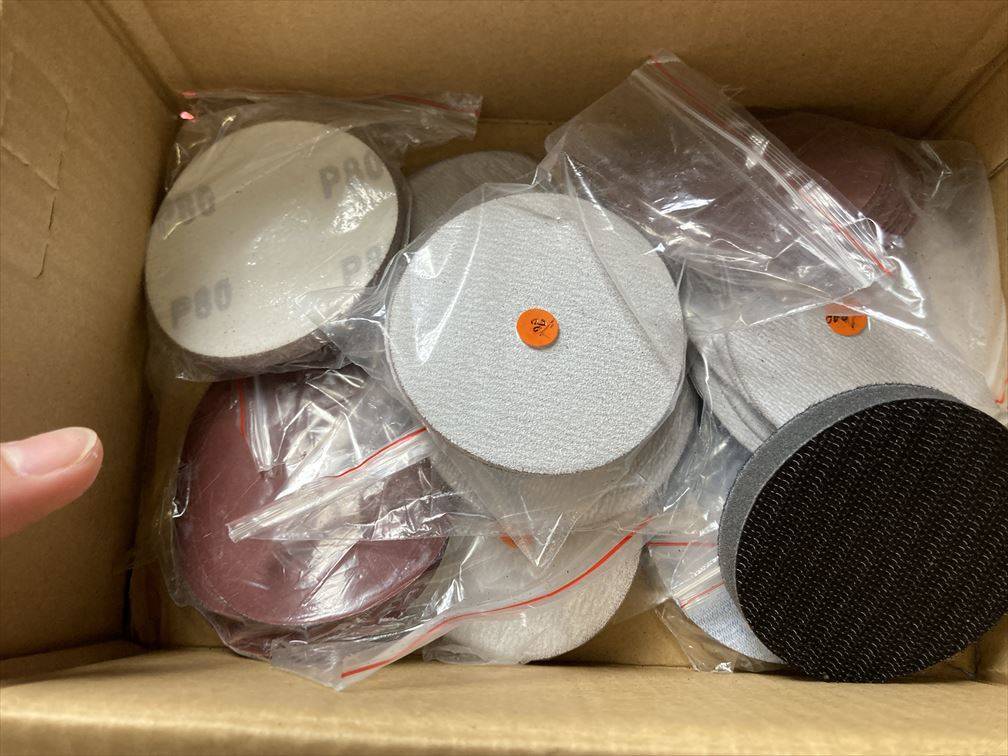
I tried various sandpaper numbers, but around 160 worked well.
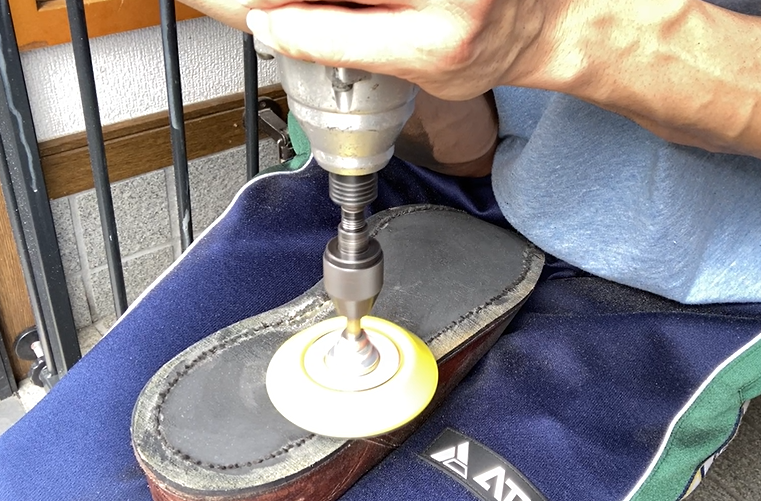
File away any large chunks or areas where the primer is thick.
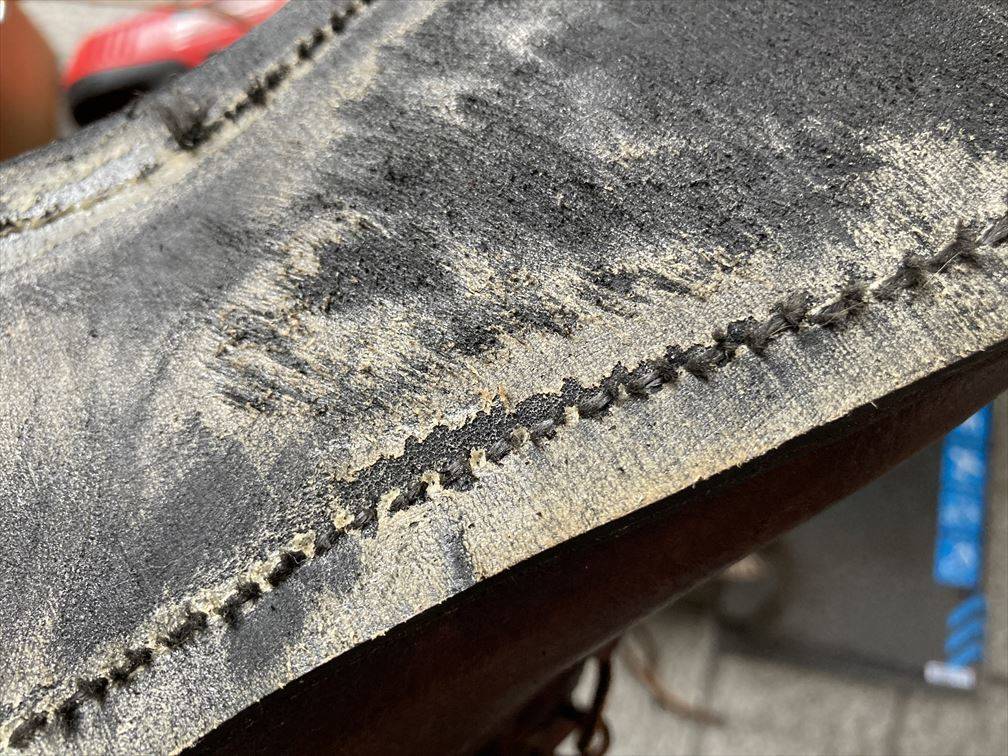
Be careful not to scrape the laces that sew the base sole and the boot body together.
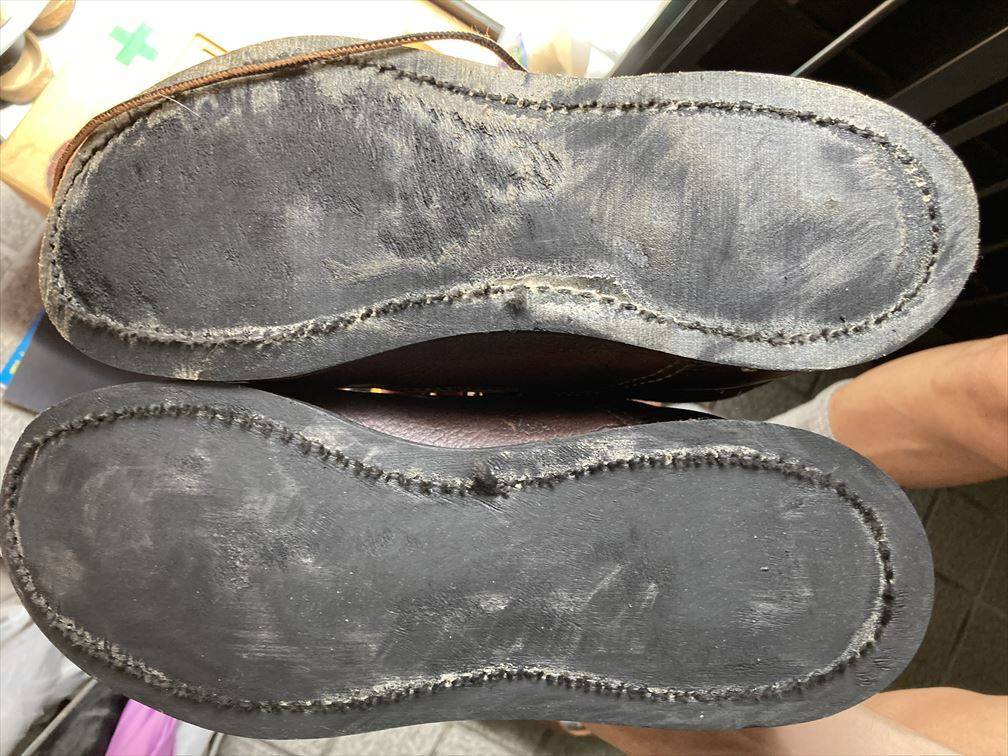
First of all, I managed to cut only the left leg, but it was quite heavy work, such as suppressing the recoil of the drill. It also takes a lot of time. After all, I was scraping for more than an hour.
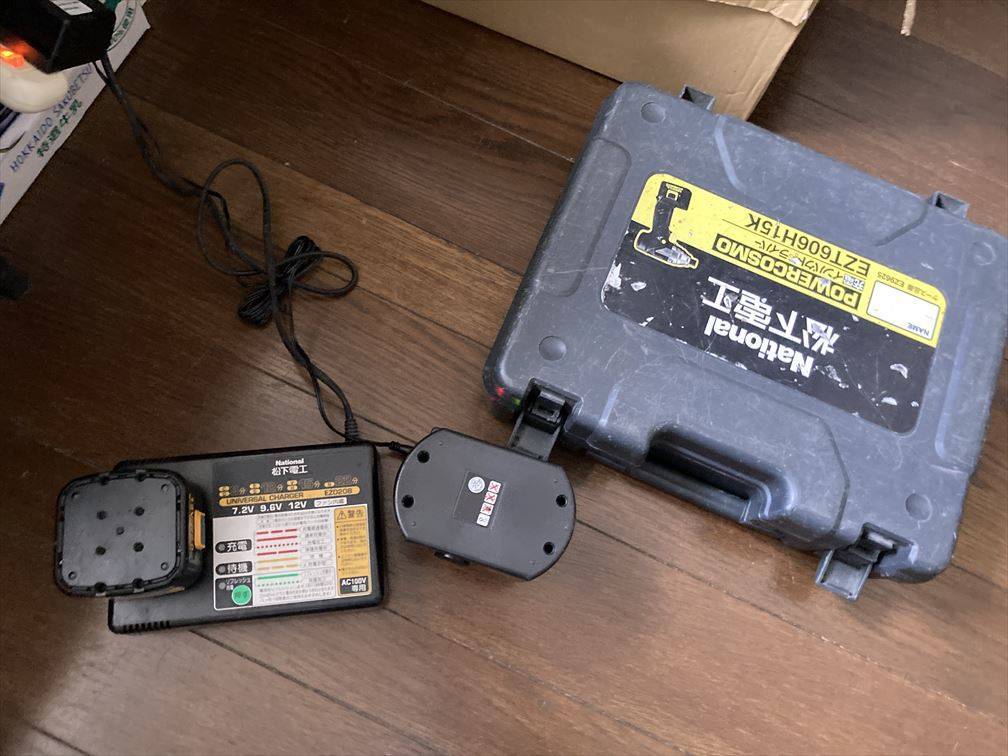
The cheap electric drill lacked power and rotation speed, so I ended up switching to another National impact driver.
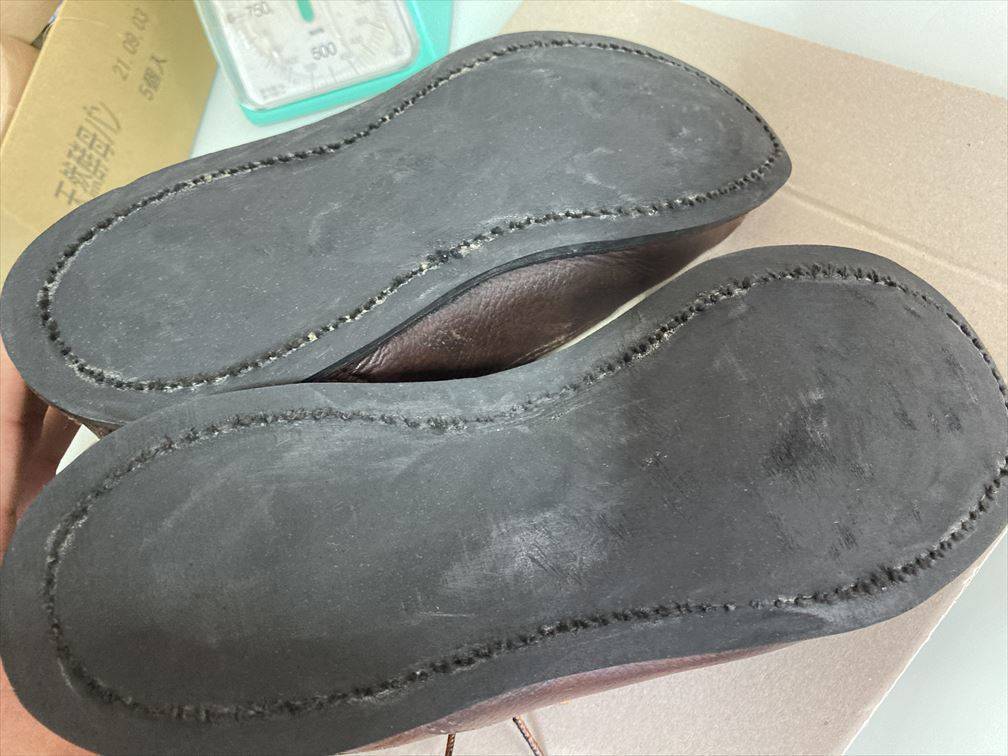
A base sole that has become beautiful after about 2 hours of work. Finish with fine-grained sandpaper.
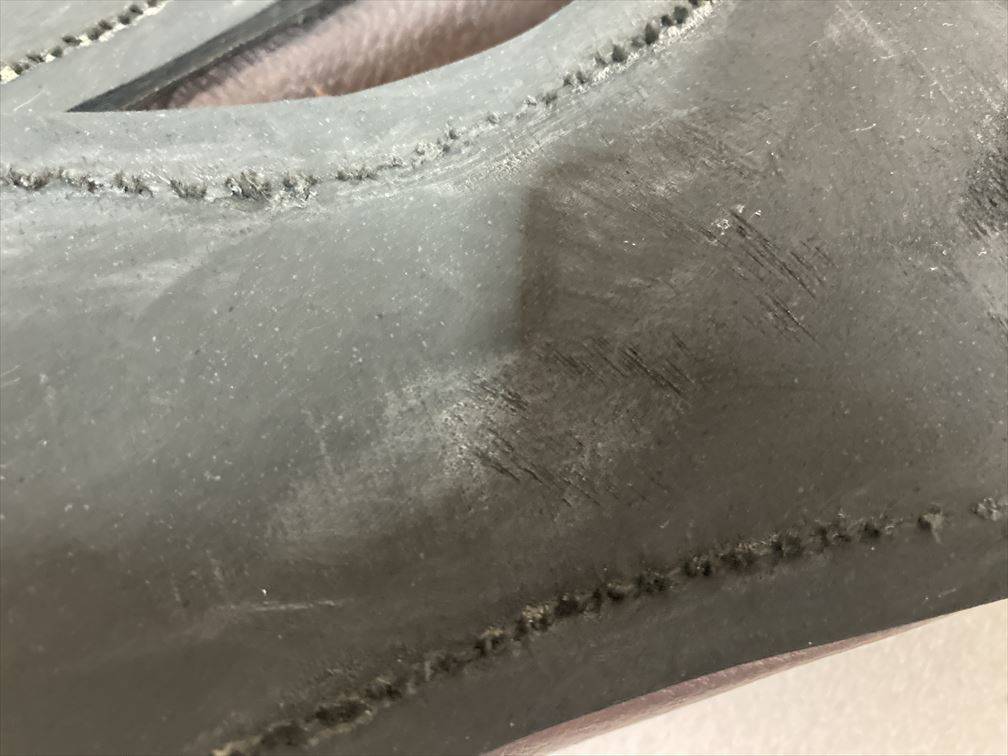
The part that was scratched with the metal brush first. I was able to smooth it out, but I didn't want to scrape the base sole too much, so I left it alone.
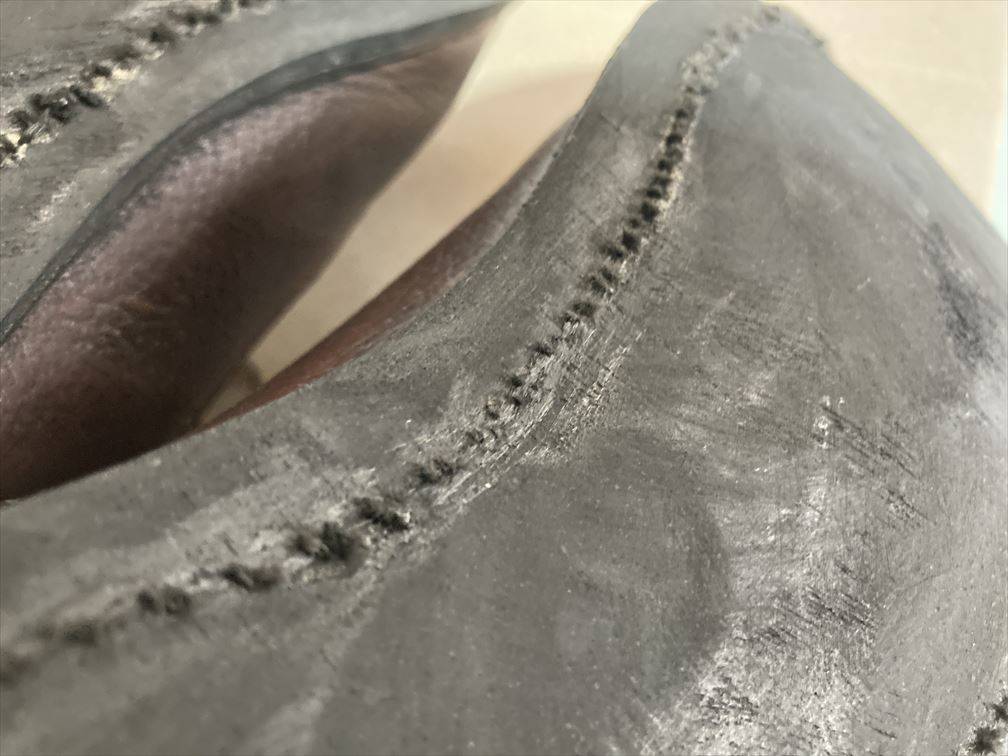
The part where the sewing string was cut off. It's troublesome, but it needs to be done carefully and requires concentration. Finally, wipe with water to remove oil and dust.
Glue the midsole with diamond bond
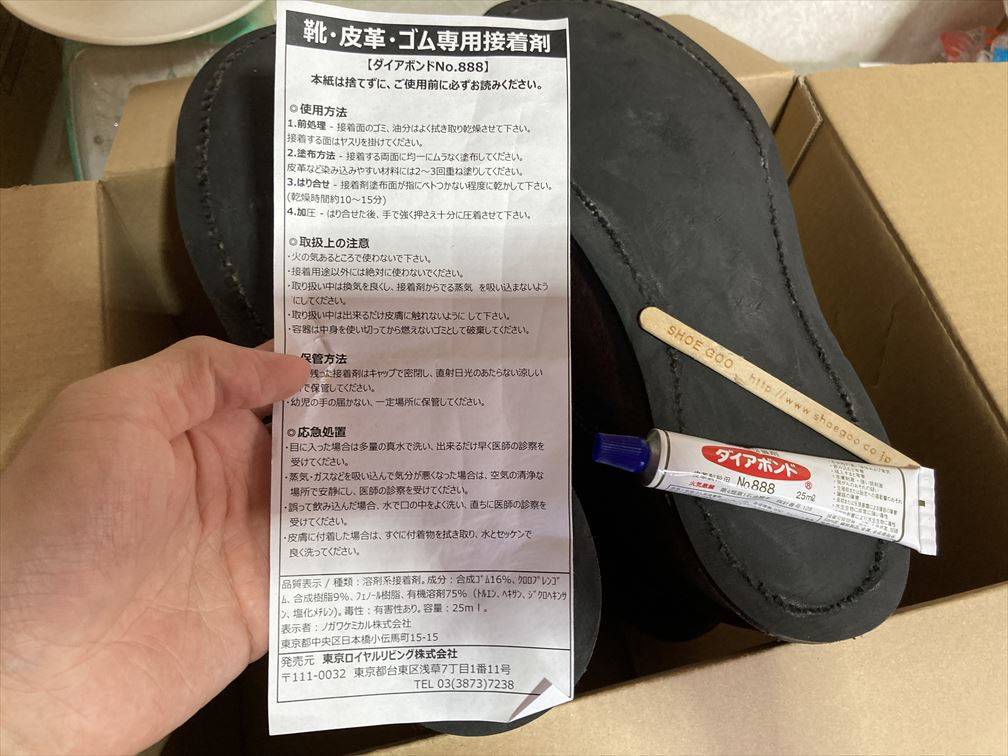
Next is the crimping of the sole. I prepared 50ml of DIABOND, but eventually I ran out, so I used Daiso's shoe adhesive from the middle.
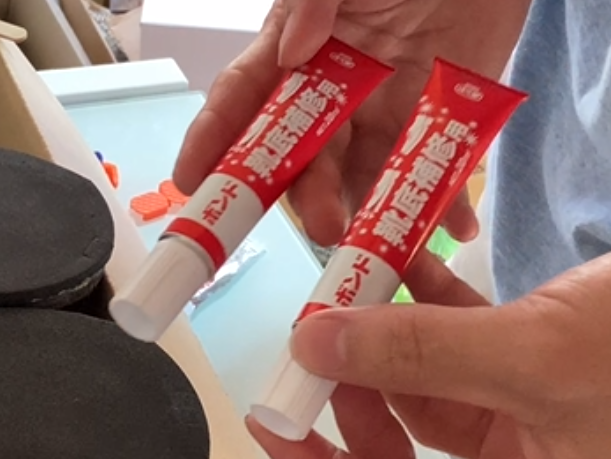
When replacing the midsole, it is recommended to prepare 125ml of DIABOND as much as possible. This time, I used both Diabond and Konishi's 100-yen shop sole repair adhesive. To be honest, my impression after replacing the sole is that the sole can be adhered properly even with the adhesive from the 100-yen shop. There is no sign that the sole will come off while walking in daily life. So, without bothering to buy a diamond bond, it seems that the sole can be replaced with a 100-yen shoe adhesive bond. However, it has not been verified whether it can actually withstand mountain climbing. →Peeled off immediately. Details below.
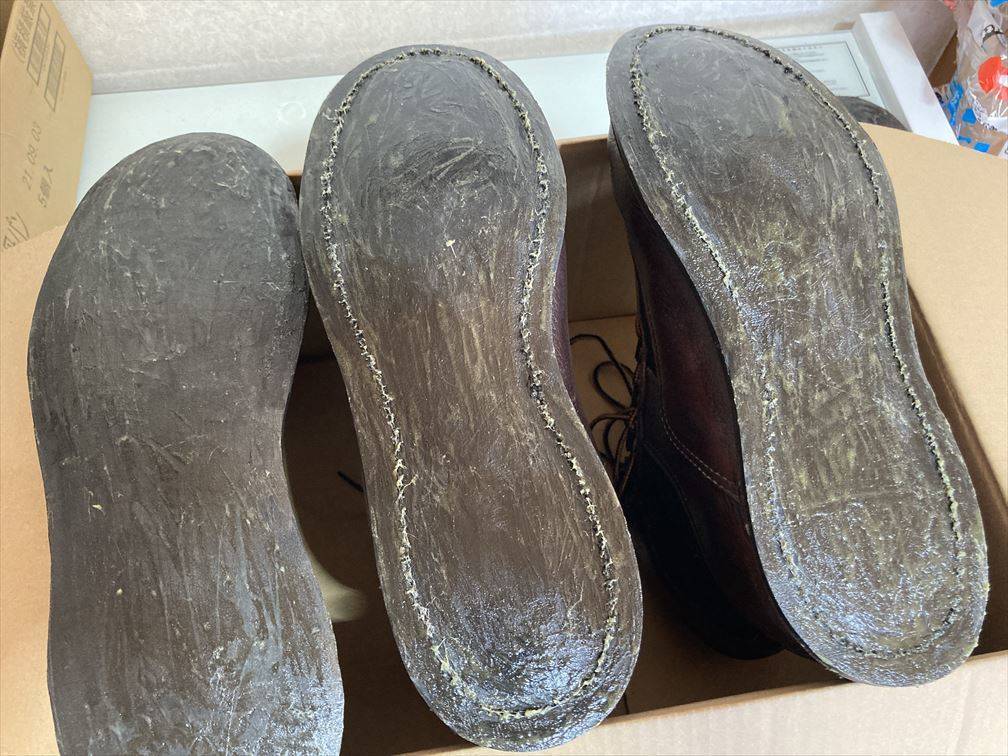
First, apply diamond bond. First time. Spread evenly with chopsticks.
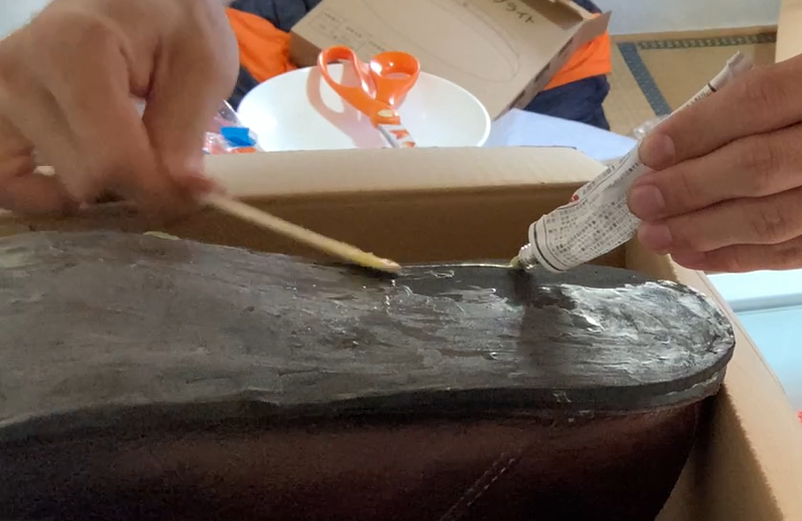
Let it dry for about 15 minutes and apply a second coat. The key is to apply it twice. It took more than 30 minutes in total, even just applying this adhesive required careful work. Instead of applying it thickly, the point is to spread it out as thinly as possible. If you apply it thickly, the adhesive itself will become a layer, and the adhesive strength will be extremely reduced. In the worst case, if it is glued in a thick state like gel, it may not stick in the first place.
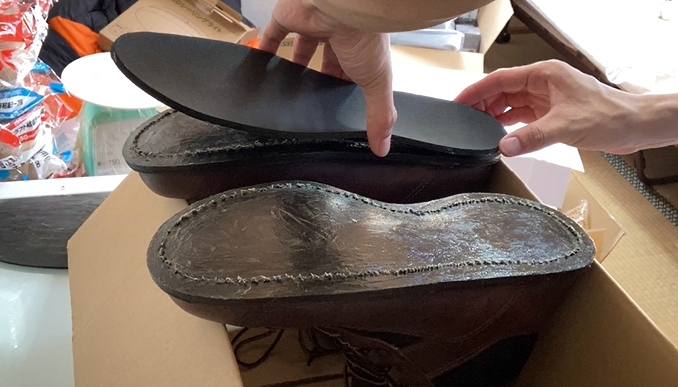
I carefully glued the midsole, but once I made a mistake, I couldn't redo it. So it's better not to cut it too tightly. The workbench is also troublesome, but it might be better to roll up cardboard into a pillar, put it in the boot, and stand up the shoe so that you can work. If you just lean it against the edge of the cardboard as shown in the picture, it will fall over and make a mistake.
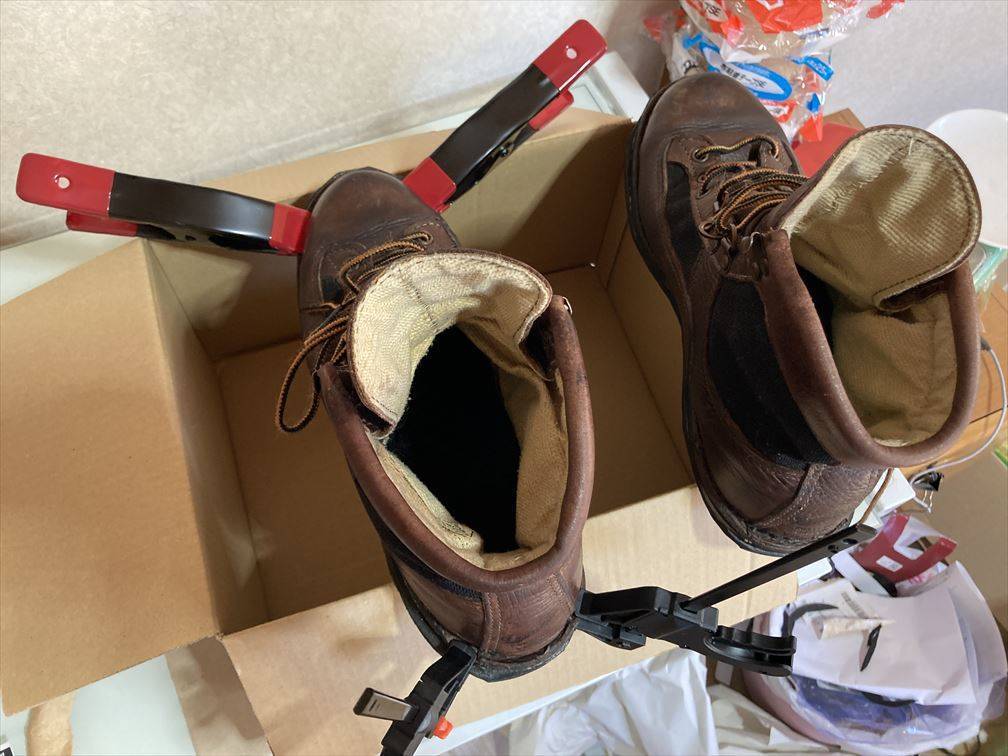
After crimping the midsole, fix it with a clamp. Especially since the toe is raised, it is easy to peel off here. You can crimp it with a hammer or pliers, but the midsole is made of sponge material, so be careful not to damage it. I applied too much force with the pliers, and the midsole was scraped and crushed.
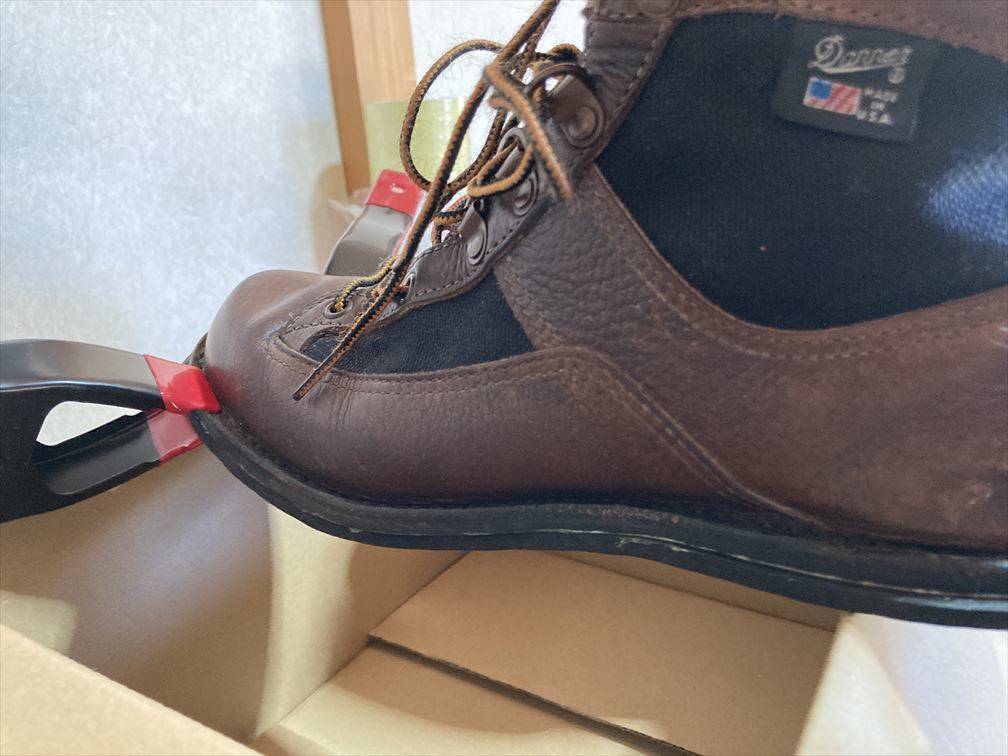
Even if the adhesive protrudes, it is OK because it will be sanded at the end. Rather, the sole will peel off from the edge, so it's safer to apply plenty of it and leave it on until it sticks out.
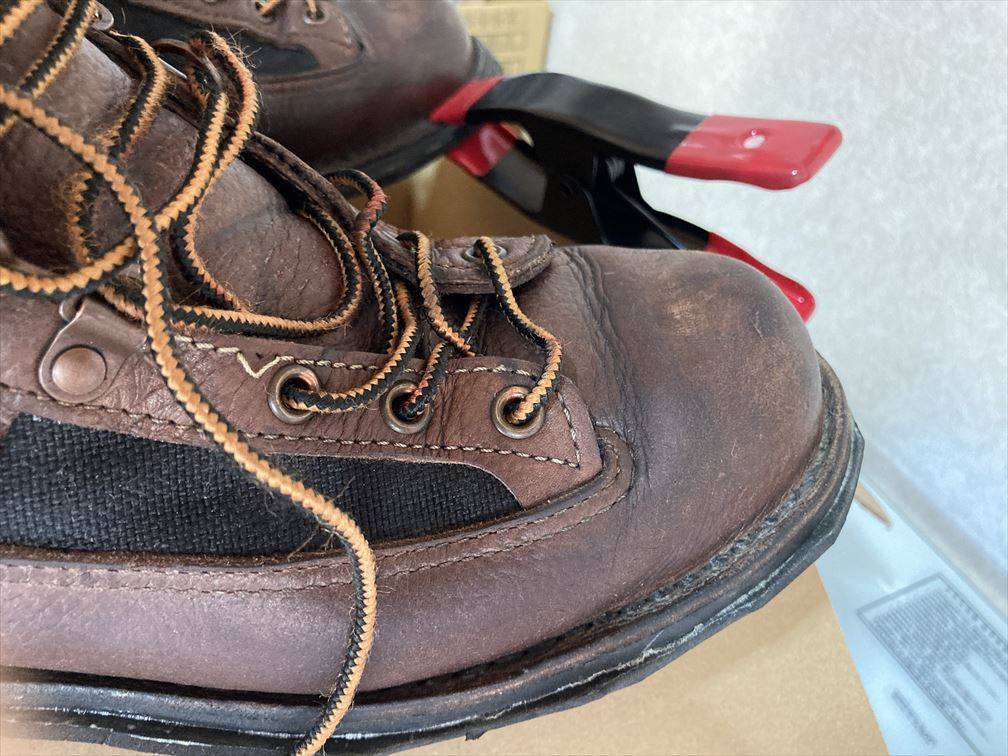
Toes. I cut the midsole to the perfect size from the beginning, so there is a part that is slightly inside due to a mistake when pasting.
Finally attach the vibram sole!
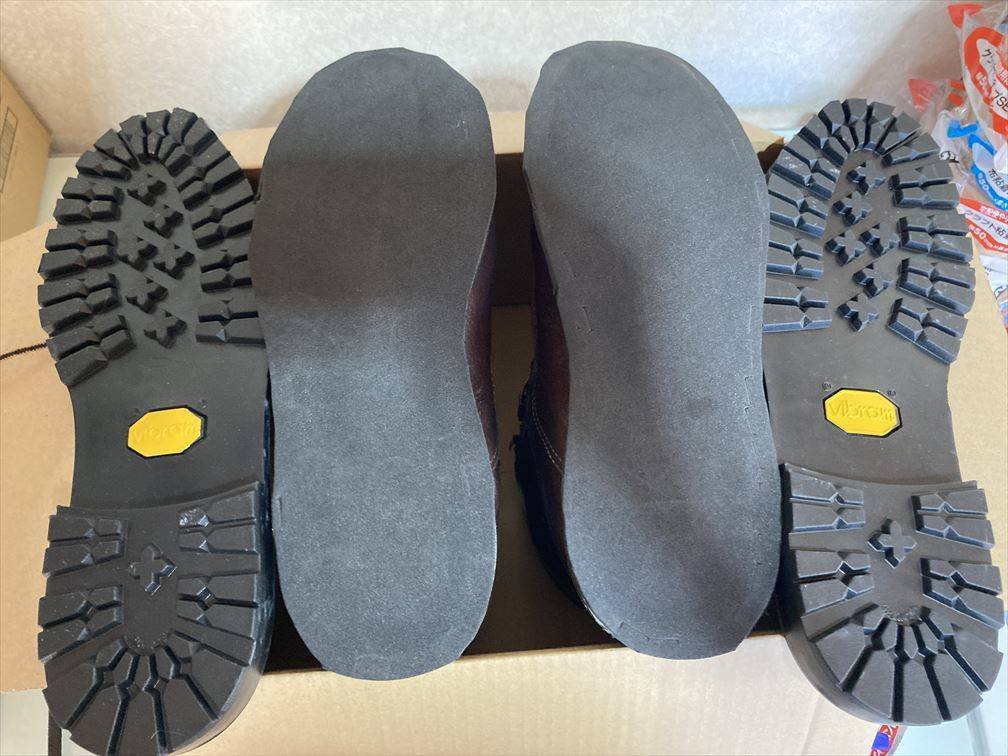
Next is the outsole, the vibram sole. File the adhesive surface of the Vibram sole before sticking. For the same as the midsole, apply diamond bond twice. Since it was lost on the way, I used the adhesive for Daiso shoes made by Konishi Bond only for the left foot. →Peeled off immediately. Details below.
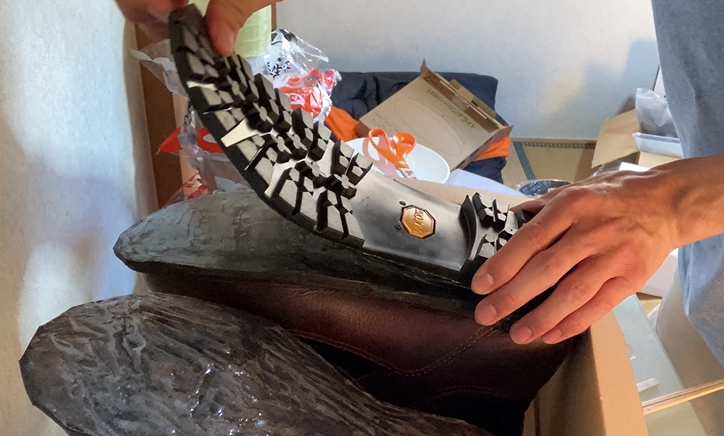
I also put the vibram sole carefully, but the position was slightly off and I failed. The reason is that I cut it too perfectly from the beginning.
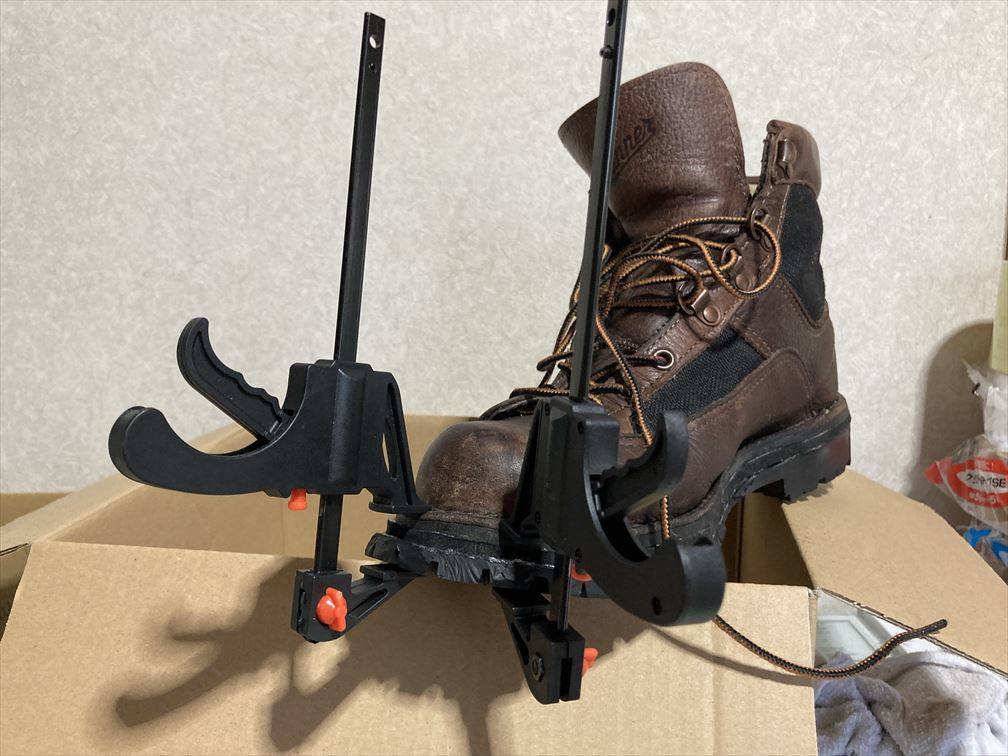
Fix the toe with a clamp for the same purpose after attaching the vibram sole. After gluing one leg, it is better to fix it with a clamp immediately. It will peel off while you are working on the other side.
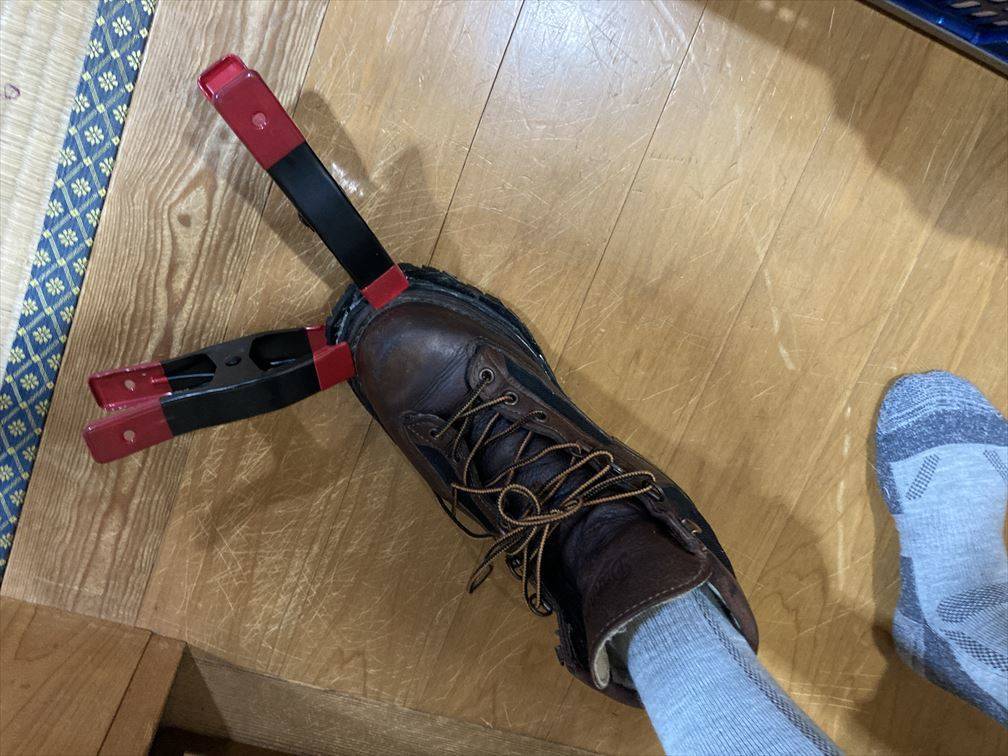
The Vibram sole, which is the outsole, is sturdy, so I carefully put it on and crimped it with my own weight, or hit it with a hammer to crimp it.
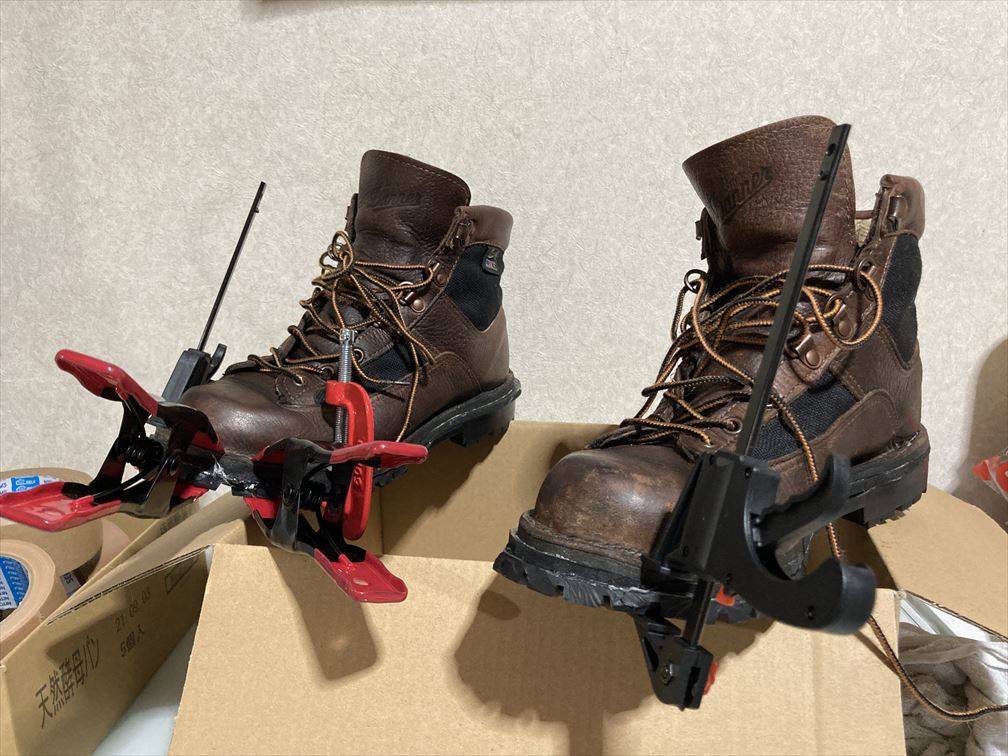
Maybe there was not enough glue on the toe, and the loosely painted part came off. So I forcibly peeled it off, added more glue, dried it, and crimped it again.
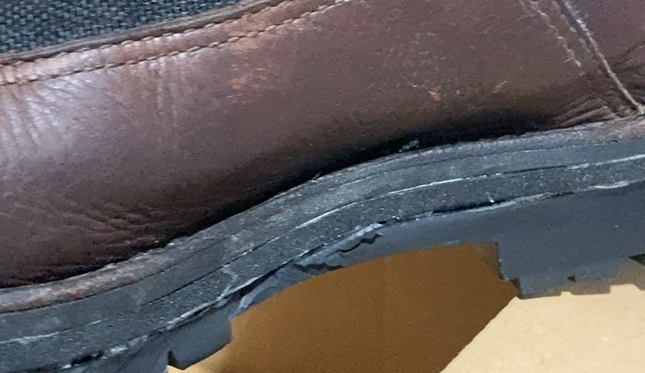
The edge of the sole is floating more than I expected, so I quickly pinch the sole with clothespins. Mistakes such as gaps are the result of cutting the sole too much. A little bit of sole got inside.
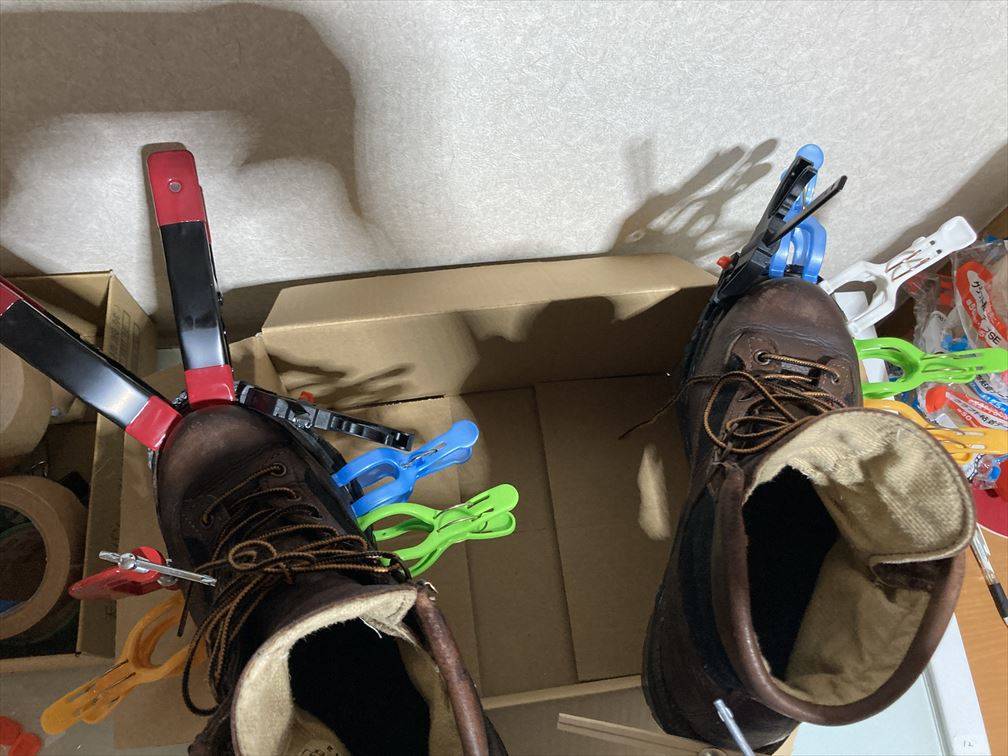
Daiso's clip clamp (black and red on the left of the photo) is easy to use. It's 100 yen per piece, so it's convenient to buy more than one. Two just wasn't enough.
After 24 hours of drying, the soles are glued together!
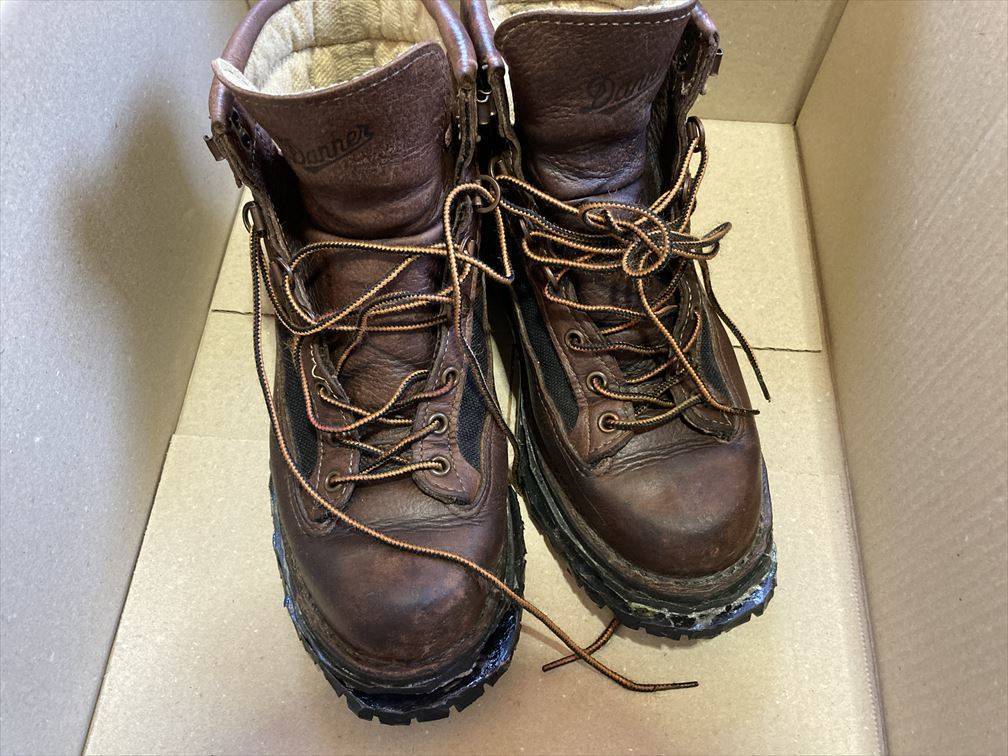
Leave it for about 24 hours with the clamp attached. When I checked it, it was more firmly attached than I thought! Was good!
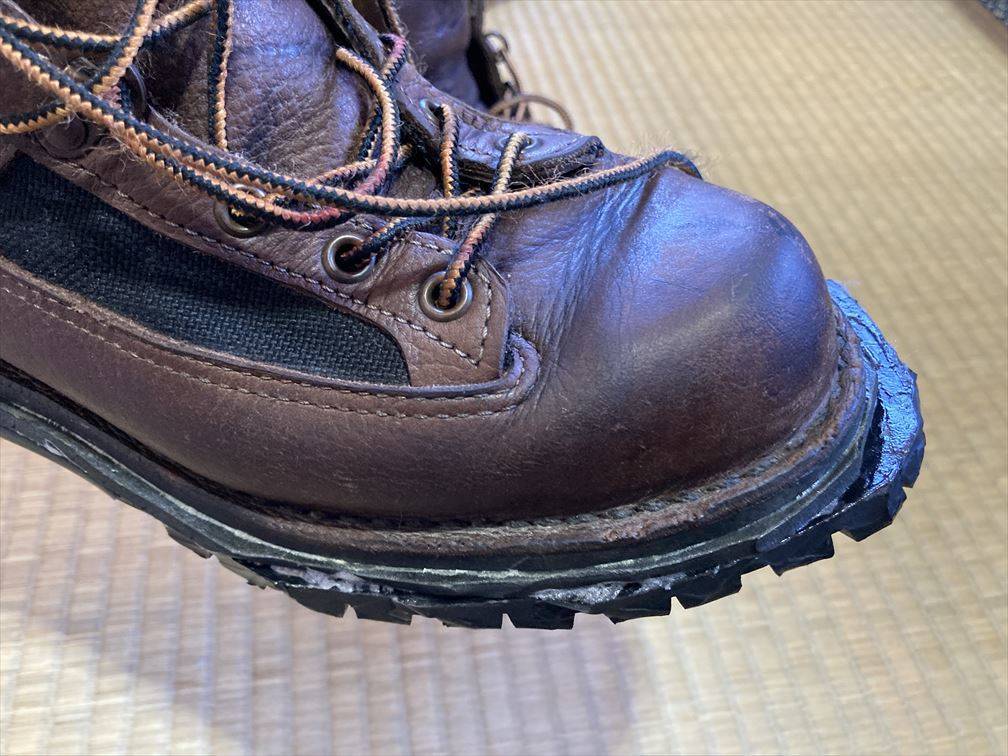
The portion of the sole that protrudes is removed from this.
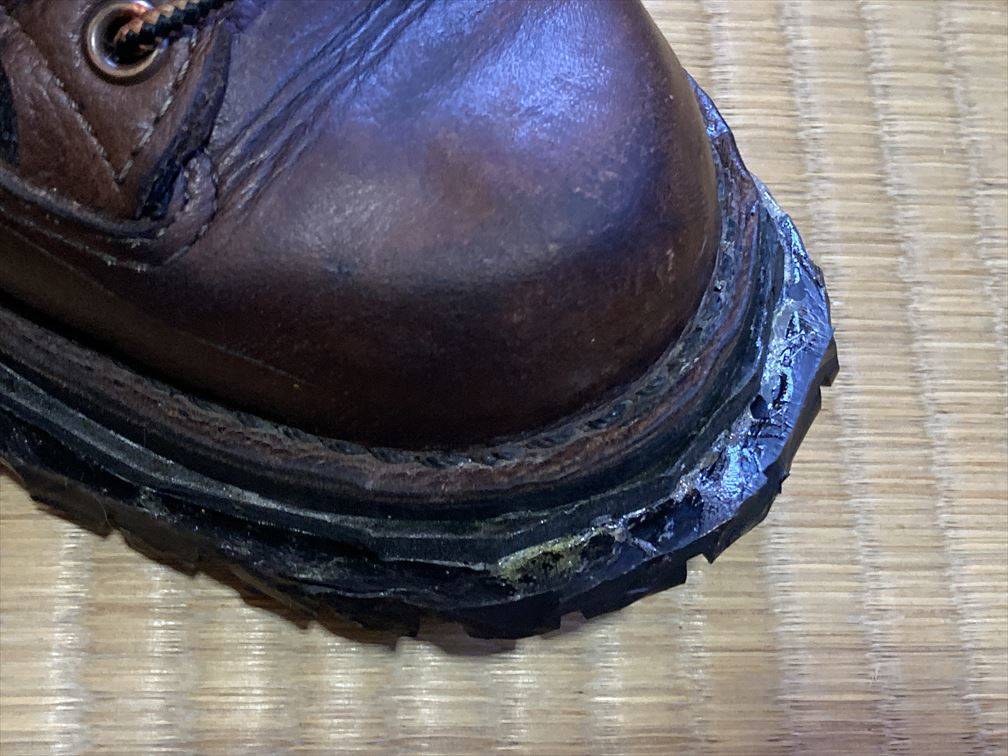
I was worried that it would look a little floating, but after scraping off the Vibram sole, there was no problem.
Scrape off the protruding sole
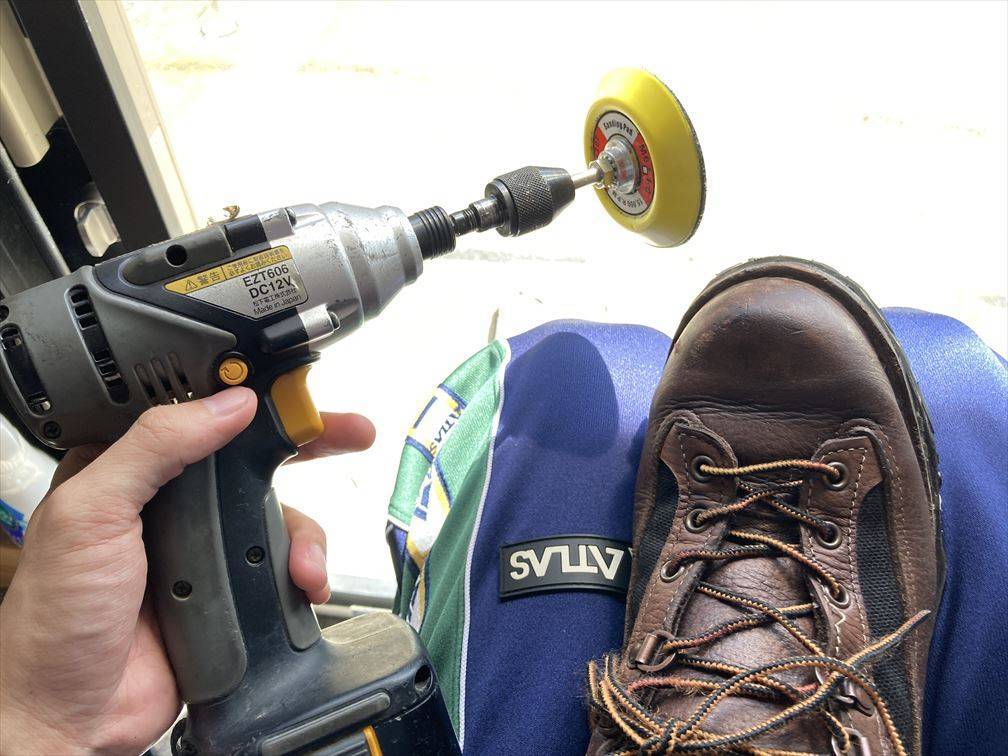
Scrape off the protruding midsole and vibram sole with sandpaper attached to an electric drill and shape it.
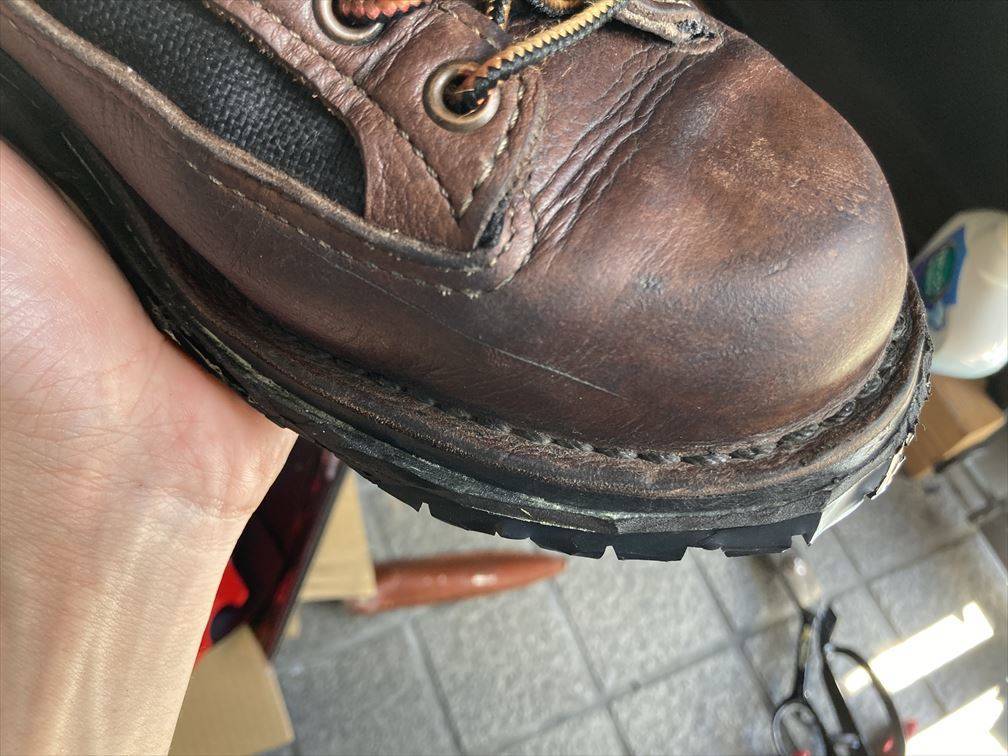
At first, I cut the protruding part with scissors.
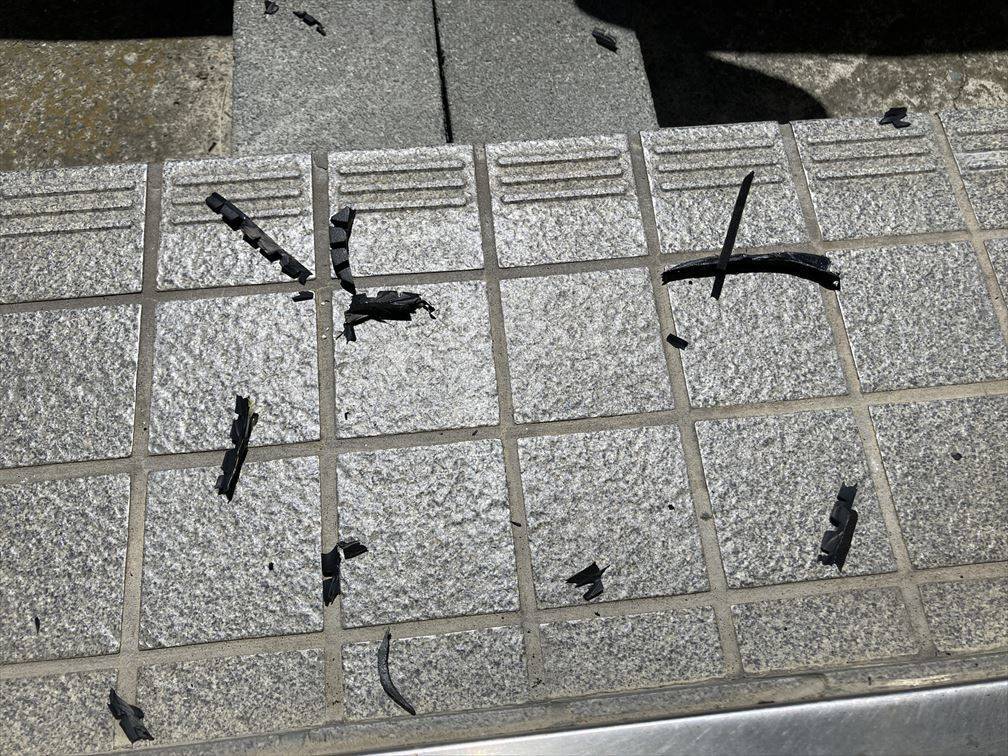
There is a lot of shavings, and the clothes and hands are black. A mask is required.
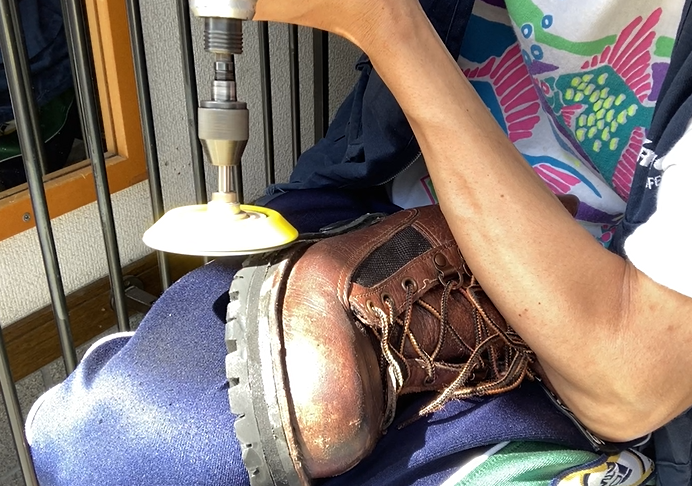
First I did a rough sanding.
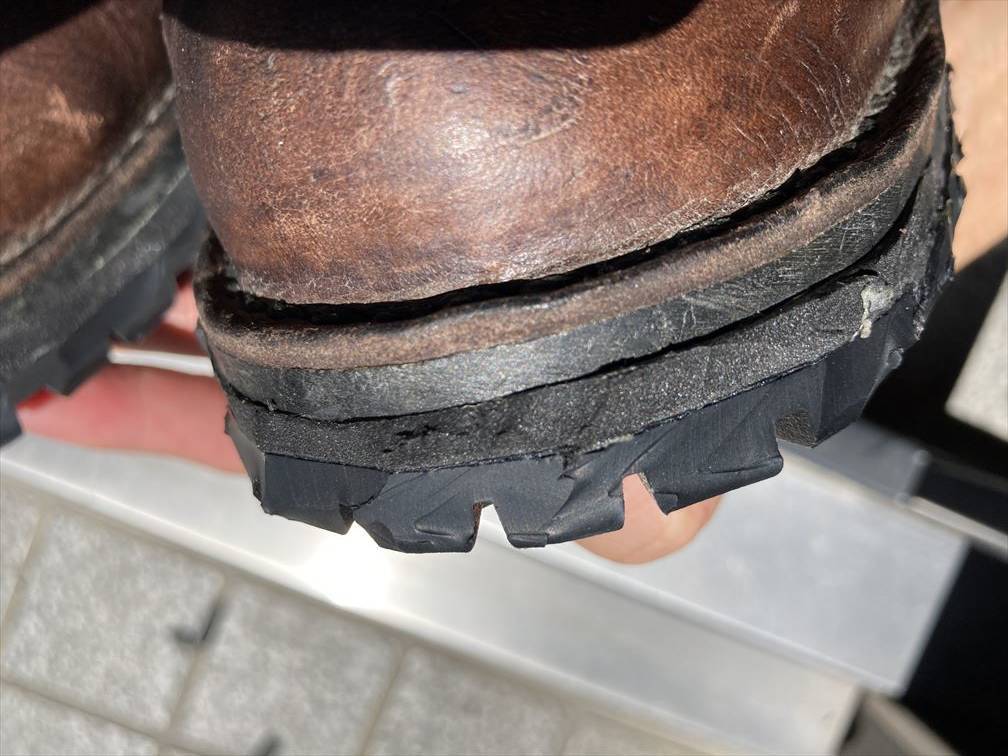
This is before sanding.
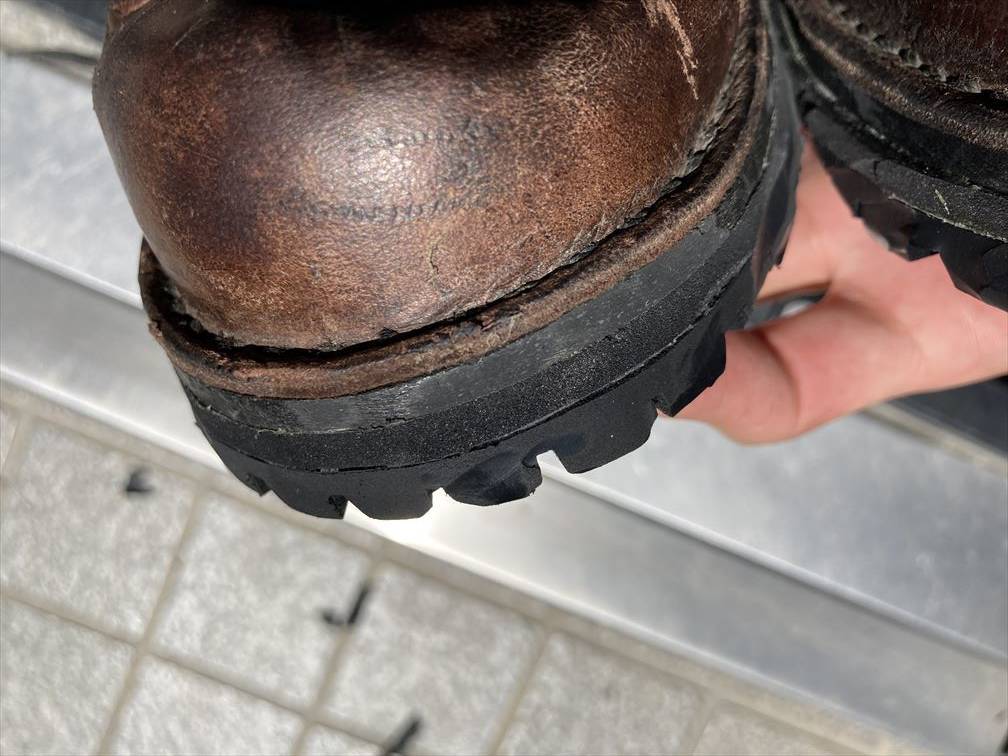
After a quick sanding. It's rounded and smooth.
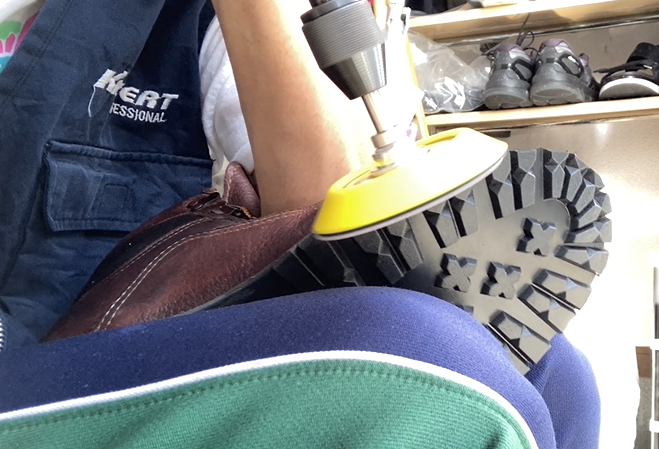
Finishing the final sole was the hardest part. It took a lot of strength and concentration to sharpen the Vibram sole, and it took more than 2 hours in total. The beauty of the midsole and vibram sole cut (edge? bundle?) is also related to the appearance of the boot, so I did it carefully.
The sole is finished. Fill the gaps with shoe goo.
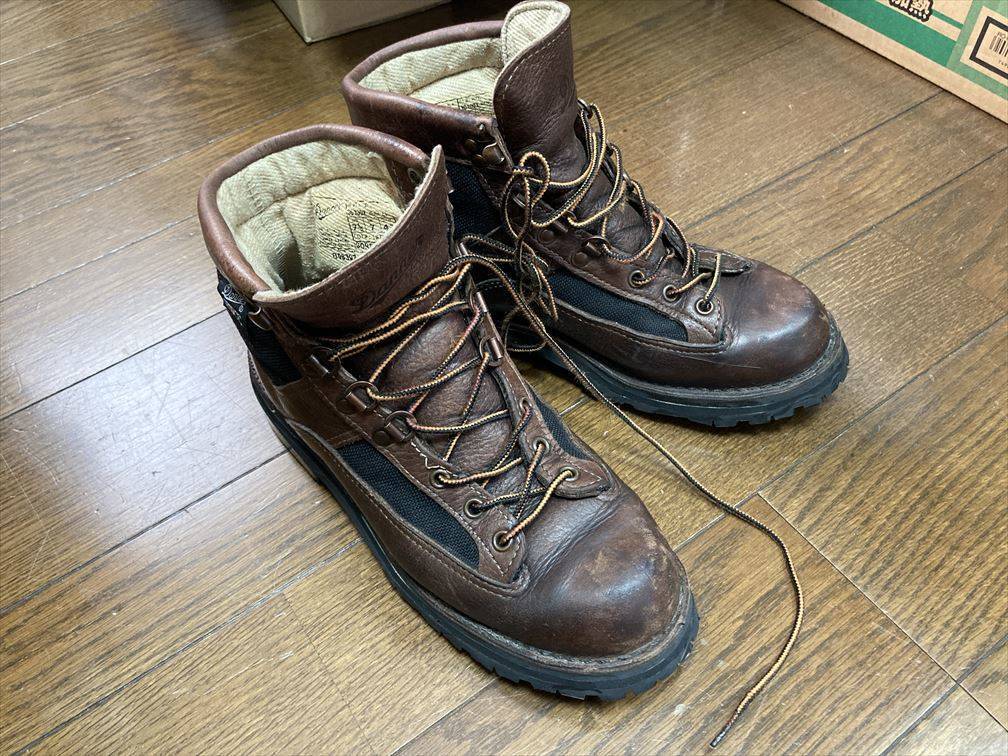
Shaving the midsole and outsole is finished!
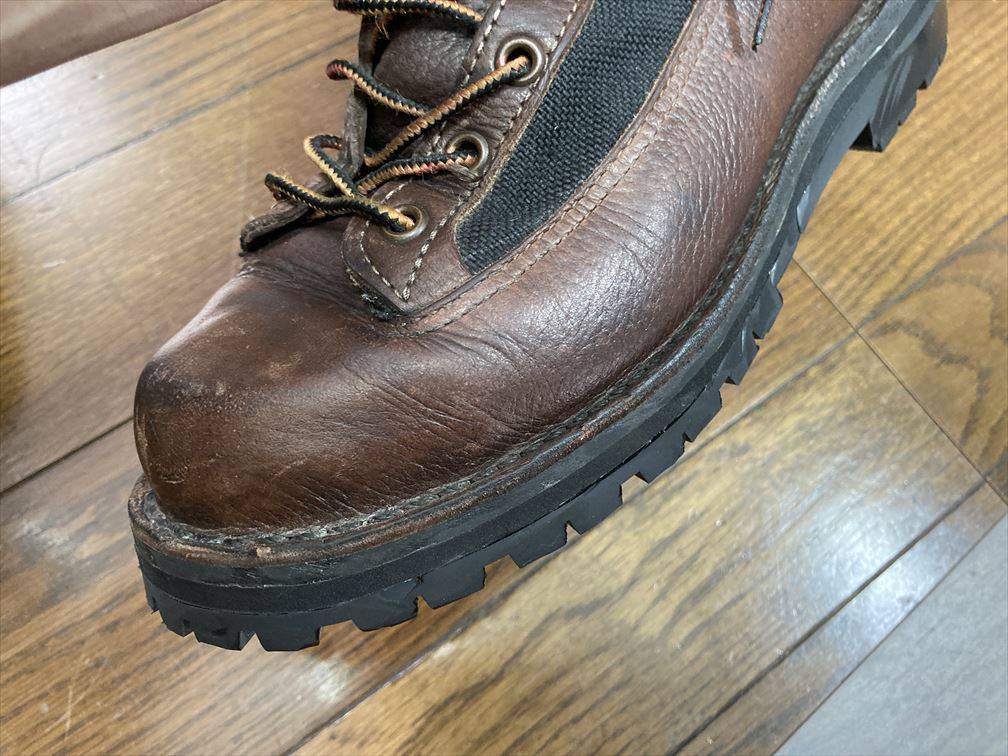
Pretty smooth!
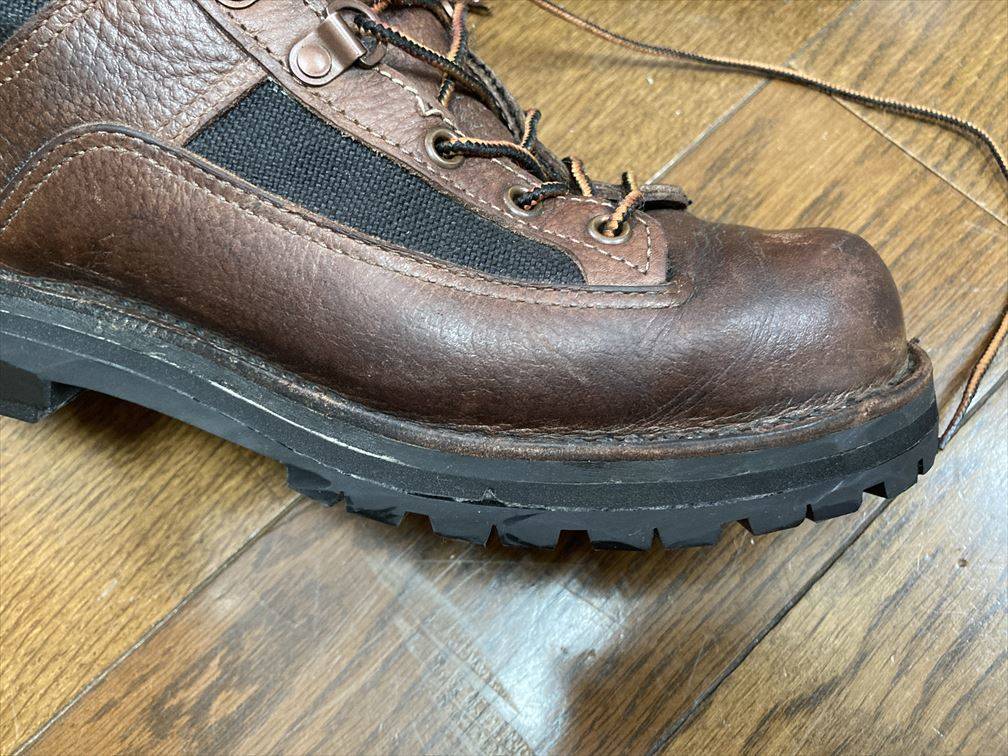
The gaps look bad and I'm worried about gluing, so I fill the holes with shoe goo.
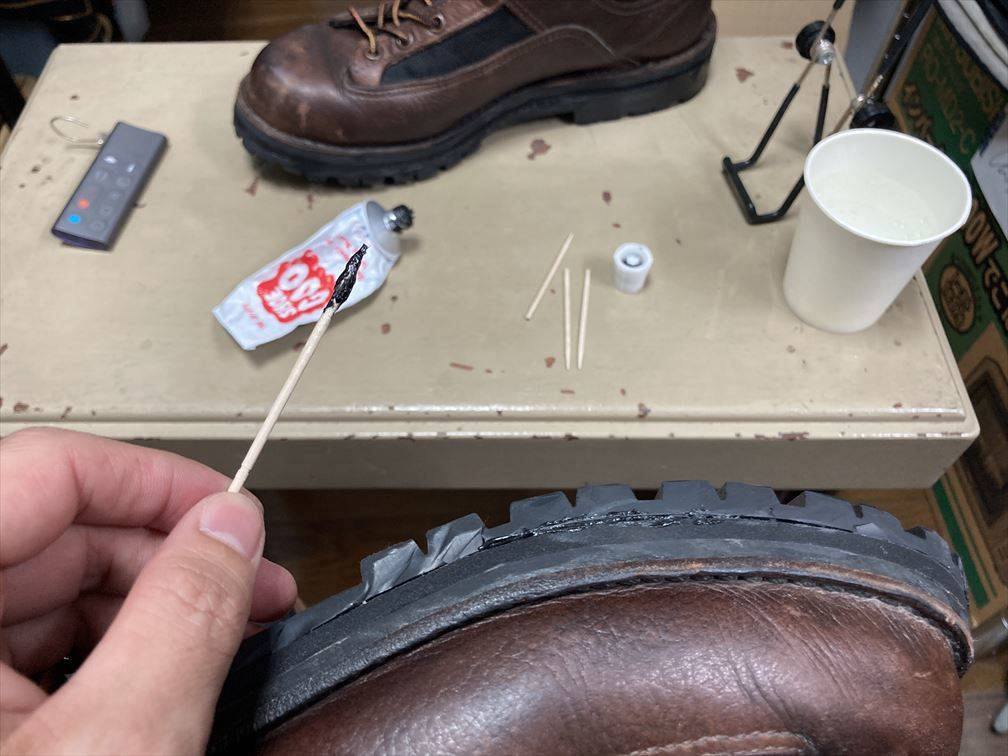
While wetting the toothpick, fill in the gaps with shoe goo. I thought about applying a thin layer of su-gu to protect the edge of the sole, but I gave up because the su-gu would easily peel off if I used such a thin layer.
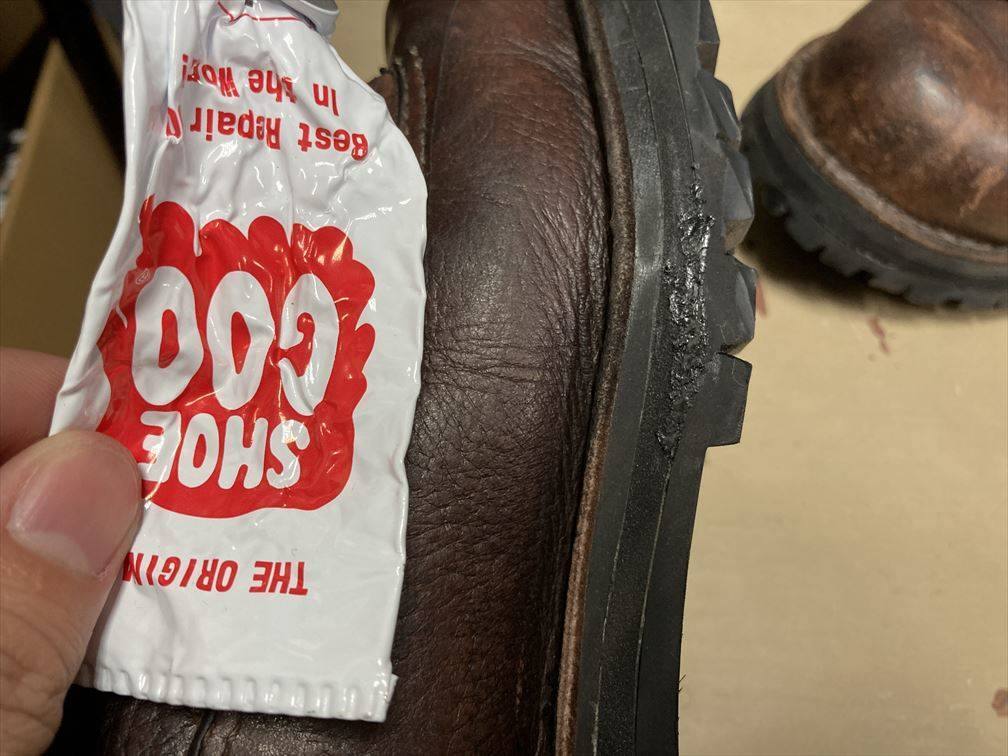
Use shoe goo just to fill gaps and holes.
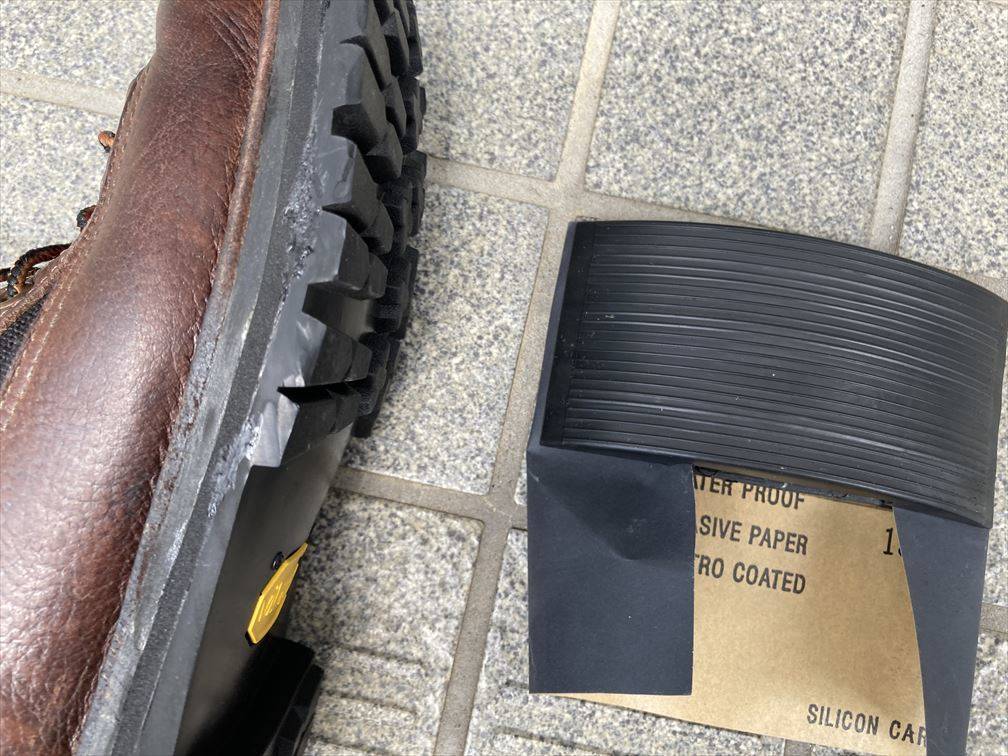
Shuguu should be dried for at least 24 hours. I tried to clean the unevenness of Shugu with a file, but I gave up on the way because it would come off due to friction. If it sticks out and you are concerned about it, cut it with a cutter or scissors.
I reupholstered Danner's sole by myself! Complete!
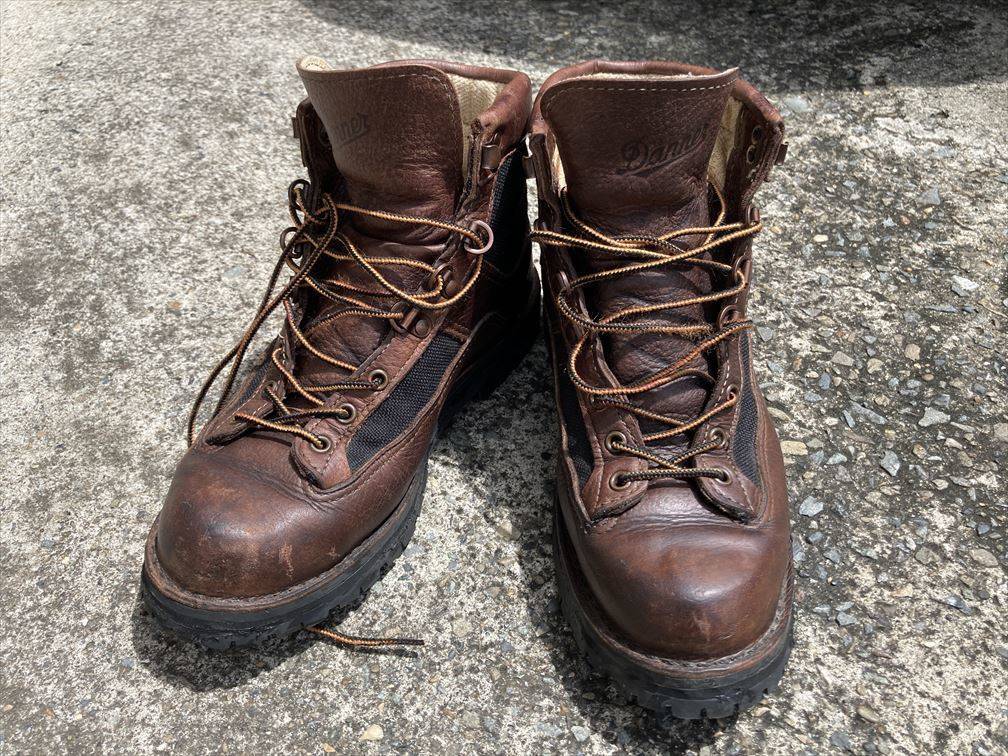
Finished replacing the midsole and vibram sole of vintage Danner boots! I never thought I could replace the sole by myself! The details are a little amateurish, but so far there are no problems with practicality or durability, and the fact that you can replace the sole yourself is nice in terms of cost. However, the work took several days and was quite a difficult task. I understand that it costs tens of thousands of yen for a shoe repair company to replace the sole. This is a job I don't want to do for a few thousand yen. The cost is also very high.

The side of the sole was sanded cleanly, but there was a gap, so I filled it with shoe goo.
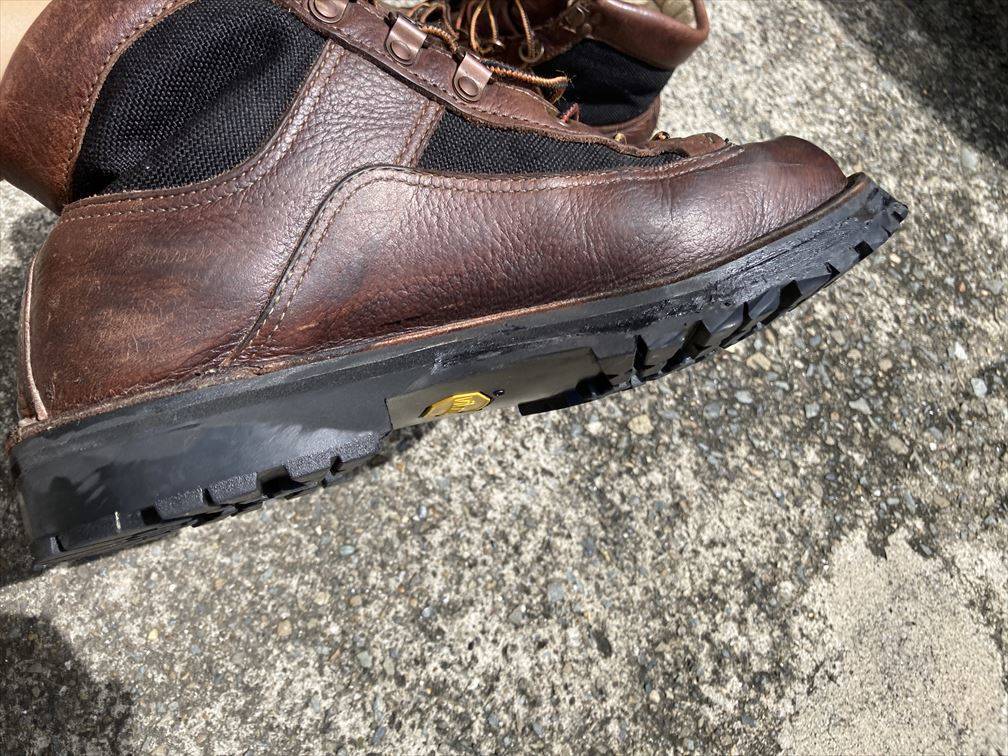
Other side.
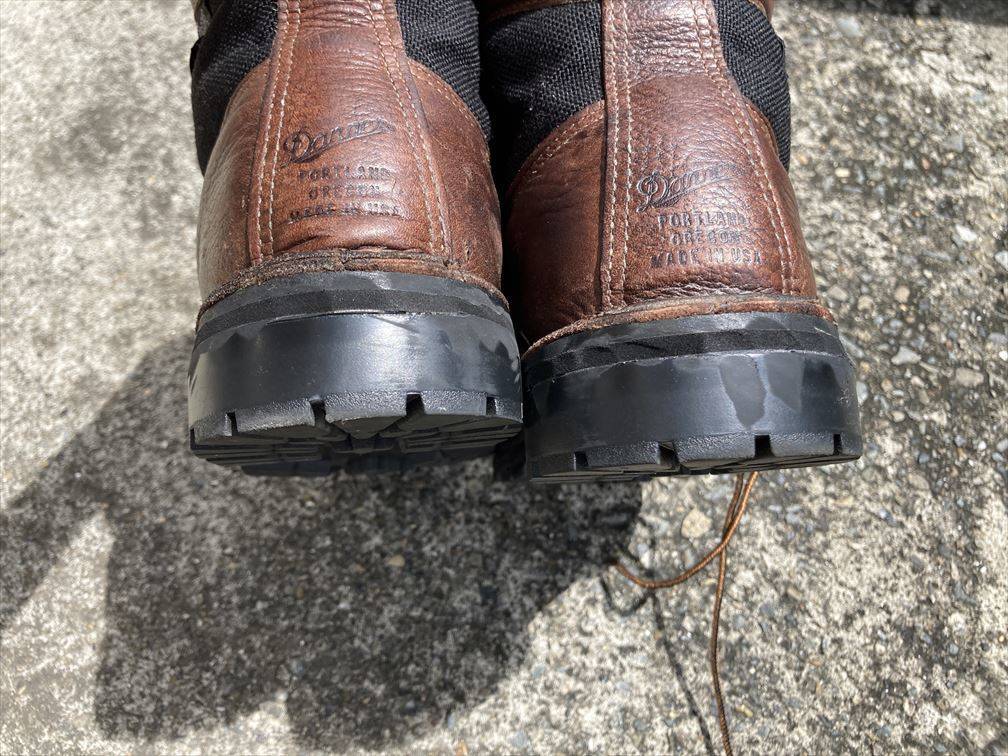
Since the size of the replacement Vibram sole and the boot body was perfect, I hardly sanded the heel.
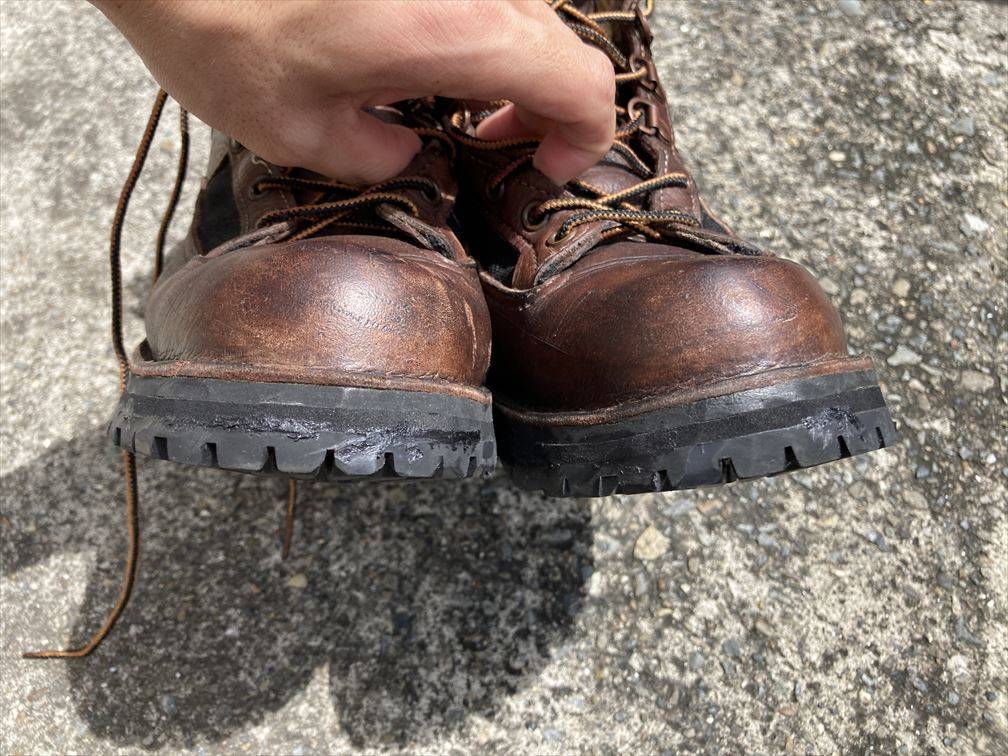
I used it for commuting for a few days, but my toes didn't come off and there was no problem with practicality.
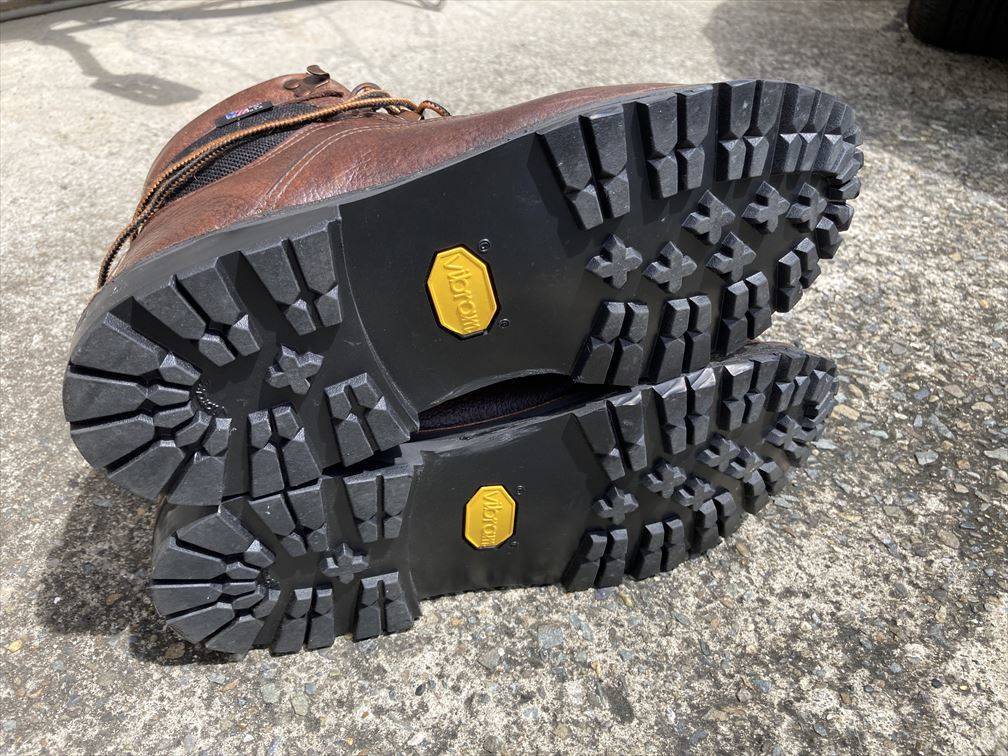
The spike part is completely revived! Now your old Danner is as good as new. It can also be worn for trekking and mountaineering.
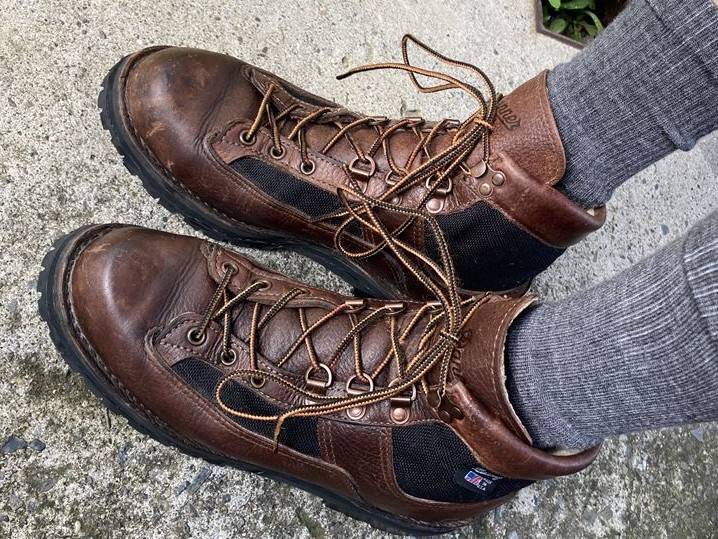
After the repair, I wanted to wear them as soon as possible, so I took a walk around the neighborhood and tried wearing them for a day, but so far there are no problems. When I go trekking or mountain climbing, I will post again about the feeling of use and durability.
[Postscript 1] Used for the first time in trekking. Some soles are reattached
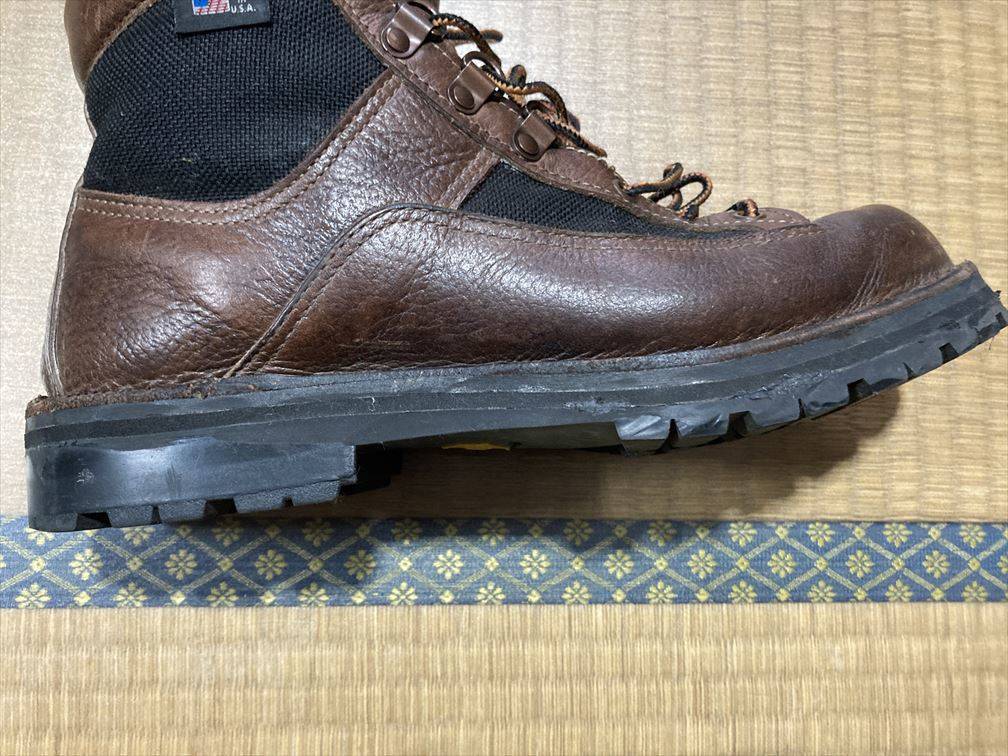
Used for light trekking of about 15 km. There is no problem with walking feeling and durability at all. The sole of the right foot, which is glued with diamond bond, is completely glued. no problem.
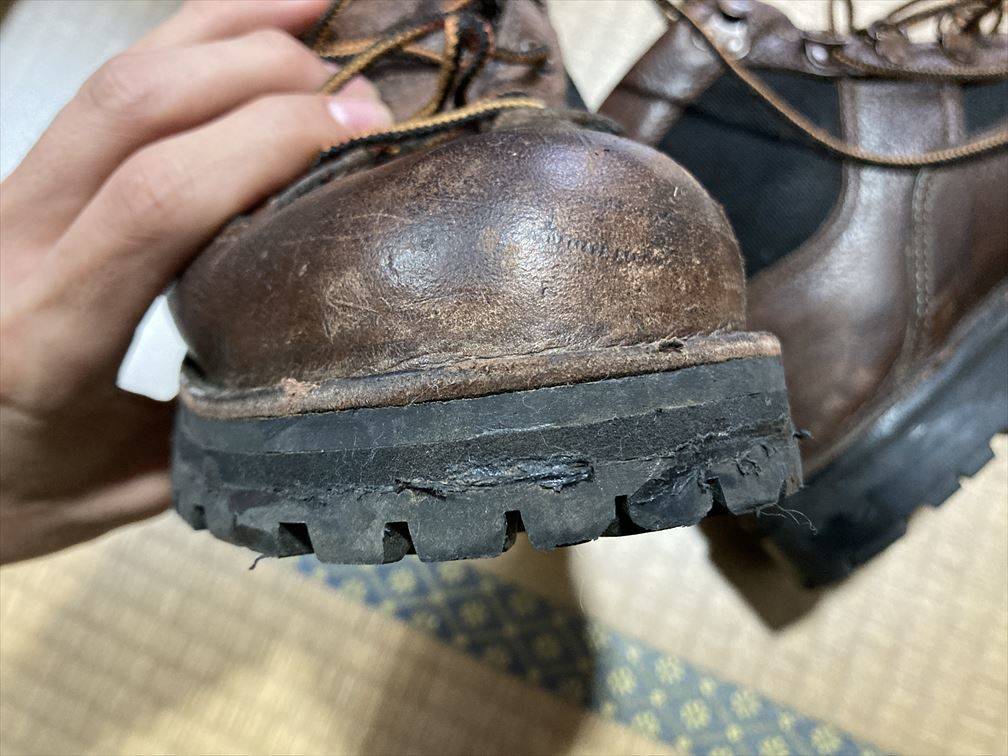
There is no problem with toes that are easily scraped or peeled off. I was worried that I might stumble because the toe is slanted because the sole is a little loose, but there was no problem.

Both feet have no problem with the sole. There is no sign of peeling off. There was no feeling of floating on the soles of my feet.

A part of the left foot where the vibram sole was attached with the sole repair adhesive from the 100-yen shop came off, so I reattached it with diamond bond. Peel off a little bit decisively. After widening the gap, pour in the diabond and stretch it with a toothpick.
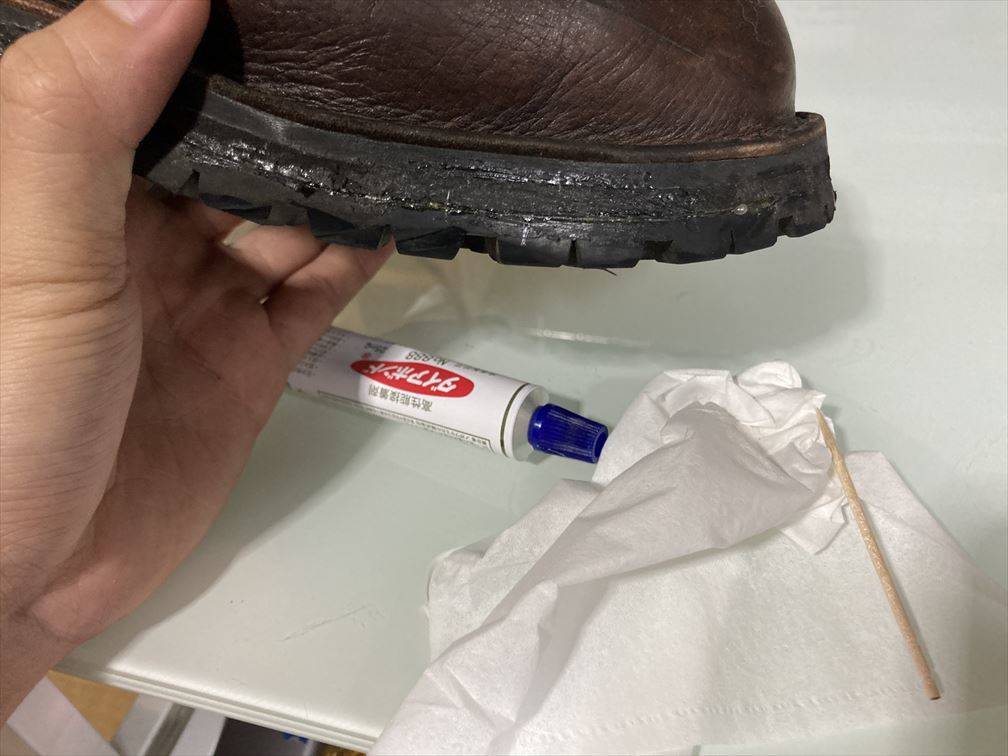
Leave it for 10 minutes so that there is air inside (so that the diabond is in contact with the air). I applied two coats and glued.
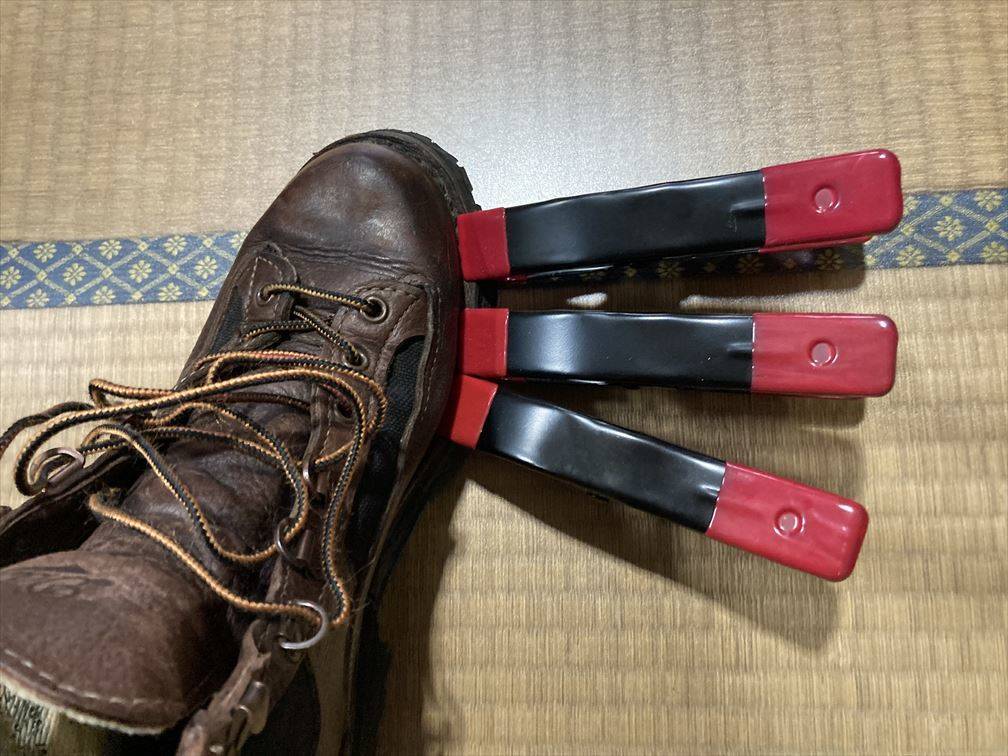
I fixed it with a clamp from the 100 yen shop "Daiso" and left it for about a day.
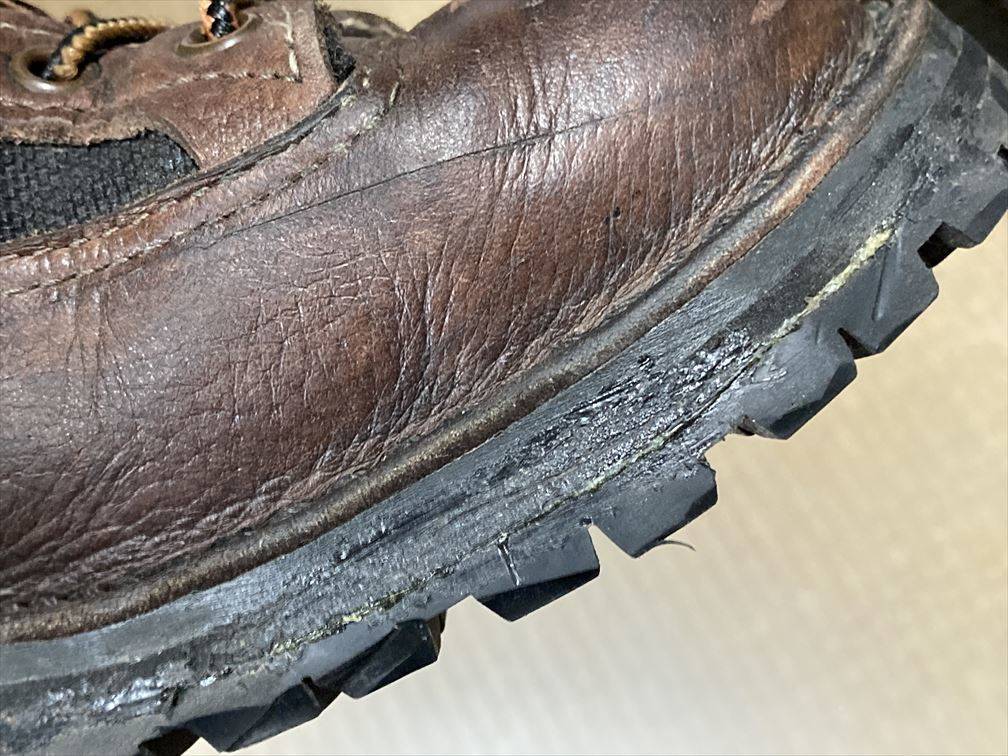
Glued without issue. The adhesive is protruding, but it is proof that it is firmly adhered to the edge of the sole.
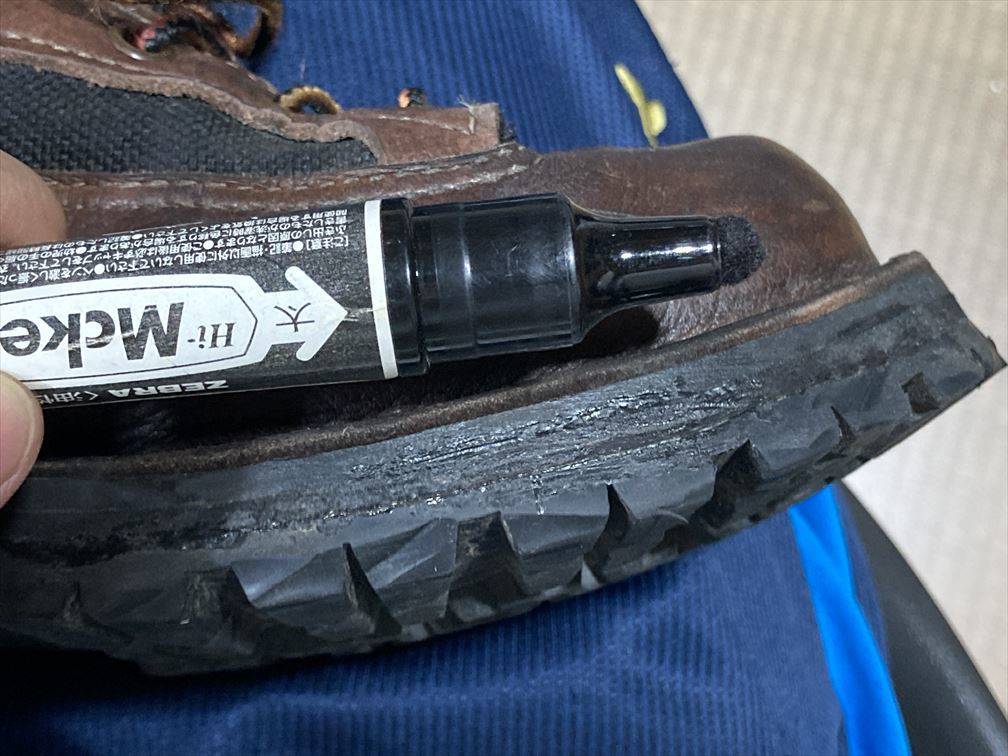
The adhesive can be scraped off with a file, but it was troublesome, so I painted it with a permanent marker to make it less noticeable.
[Addendum 2] The sole of the left foot, which was glued with the adhesive from the 100-yen shop, came off completely.

Second use after gluing the vibram sole by myself. Used during a day trip climbing Mt. Mizugaki. Only the left foot, which was glued with a sole repair adhesive from a 100-yen shop, had its sole peeled off completely. After all, is it difficult to replace the soles of climbing shoes by yourself in the first place, or is the adhesive at the 100 yen shop weak? However, there was no problem with the right leg that was glued with diamond bond.
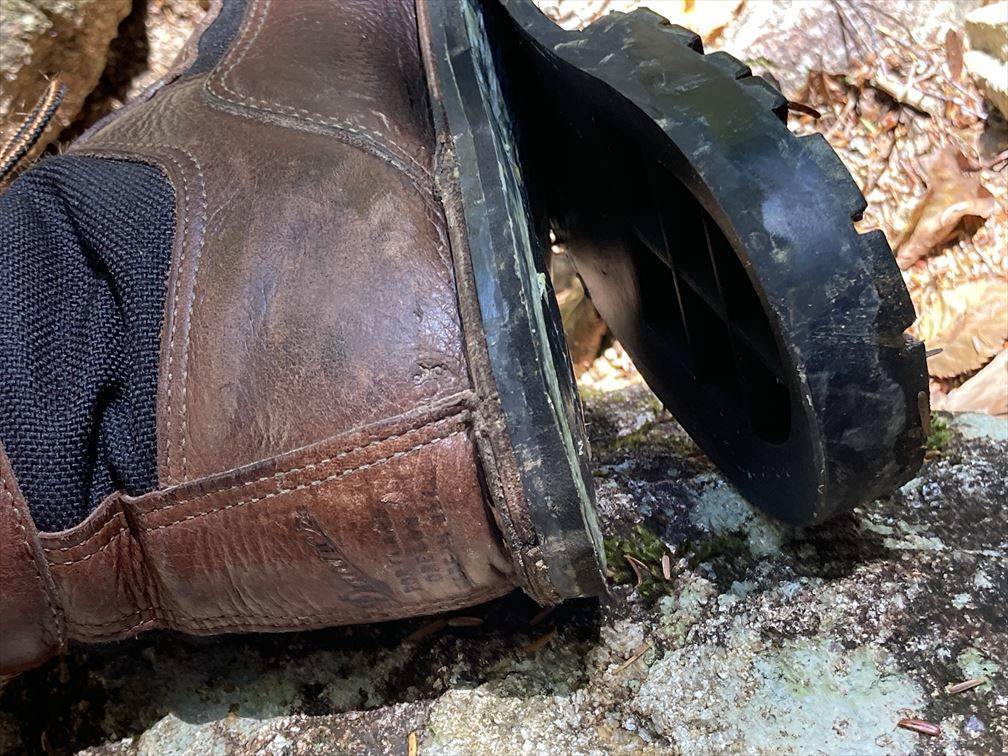
Peeled off the heel.
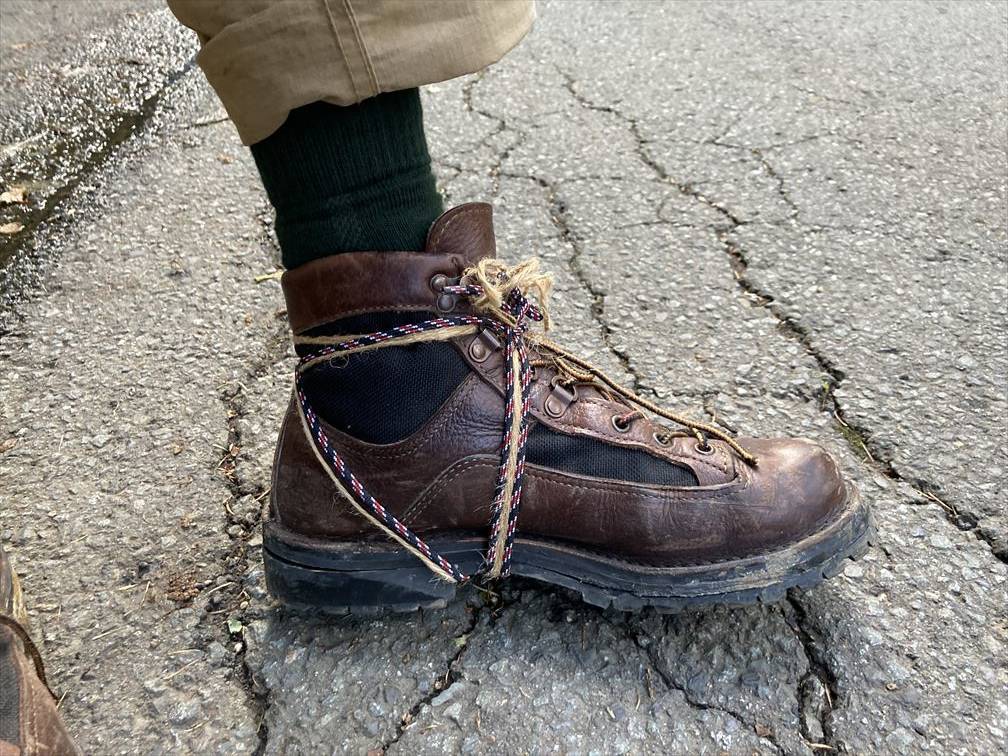
I took first aid with spare shoelaces.
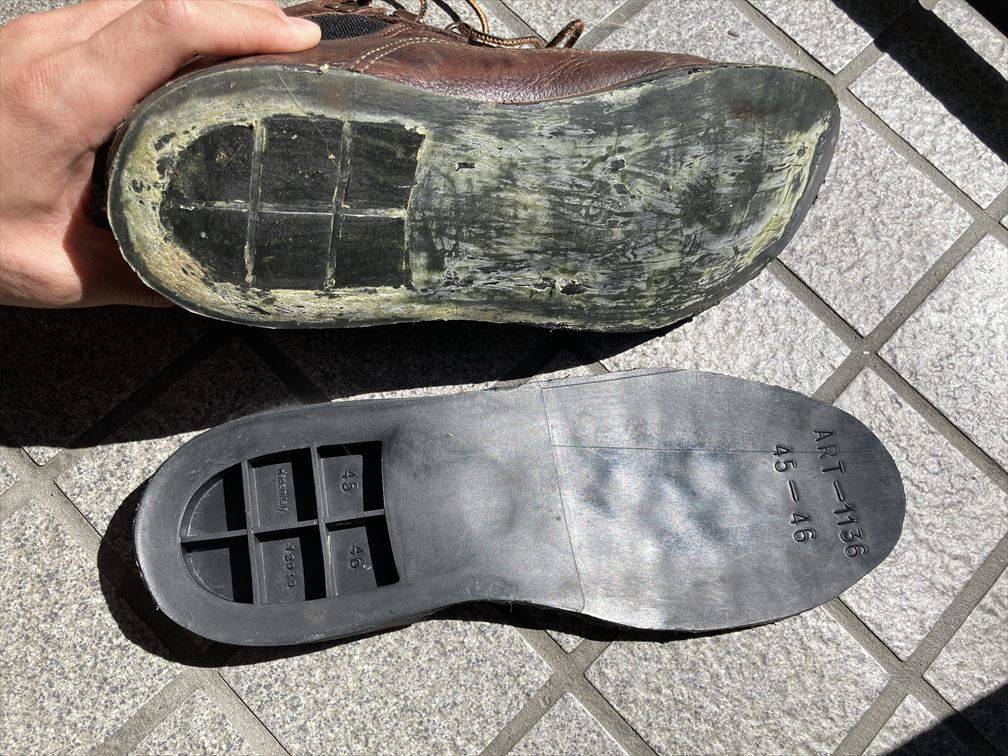
After returning home, I found that the vibram sole side was not completely adhered.
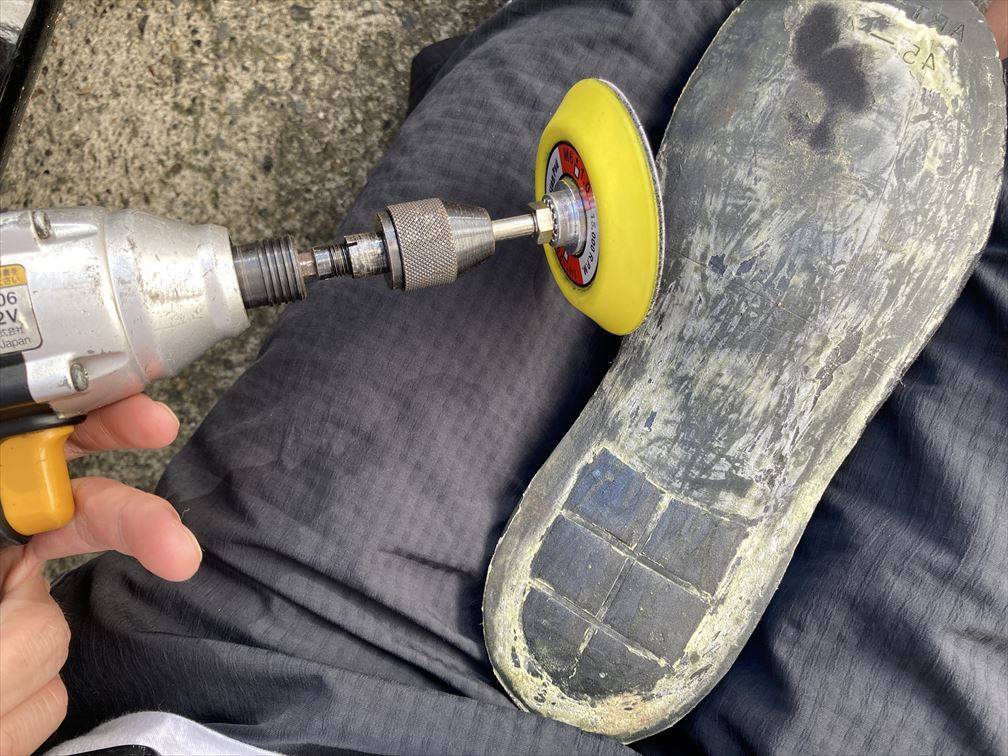
Re-glue with diabond. First, remove the remaining adhesive on the midsole.
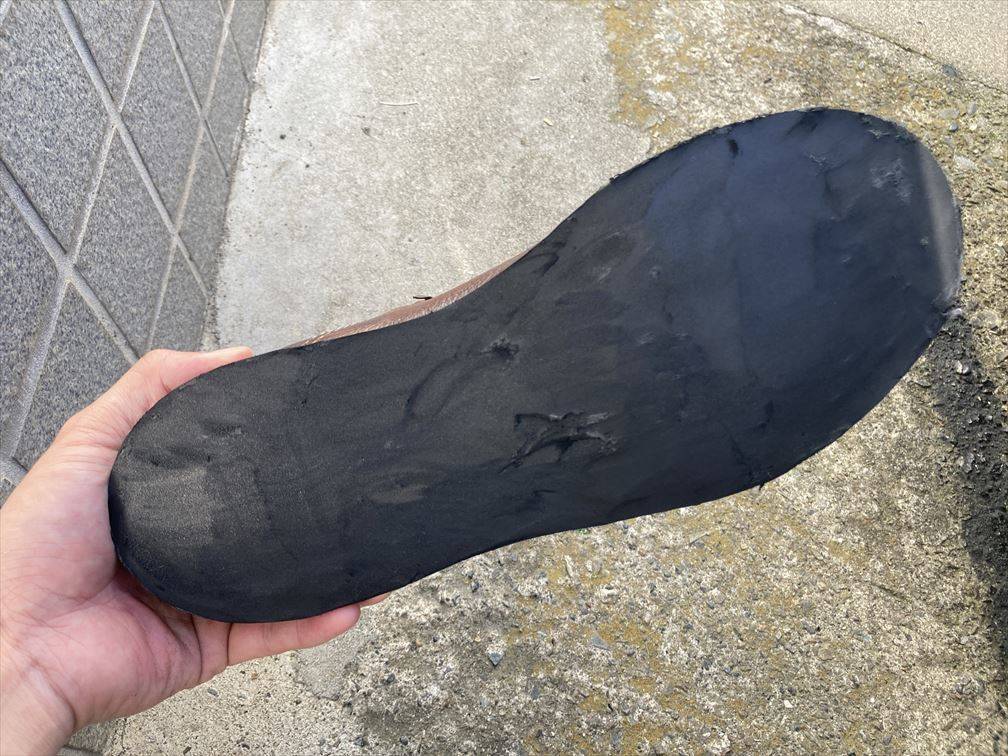
Since the midsole and the main body of the climbing shoe are glued with diamond bond, the midsole will not be replaced this time. I carefully drilled and sanded the midsole so as not to scrape it as much as possible, but some of it was worn out.
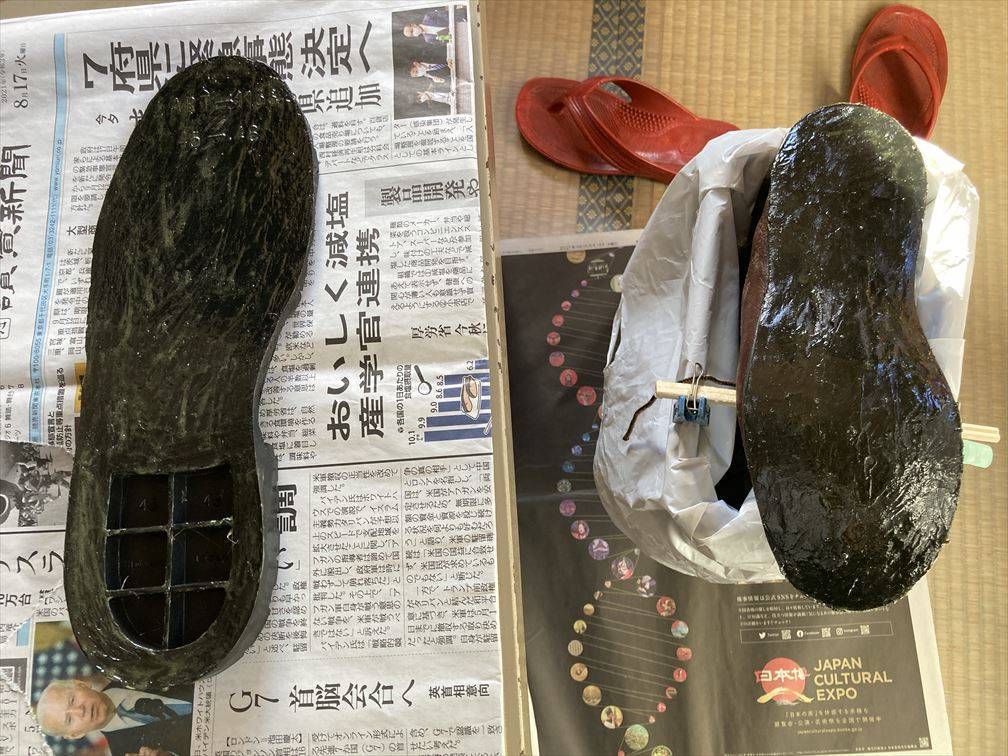
Glued with diabond. Actually, after this, I missed crimping the vibram sole. Since it is cut to fit the size, the shoe and the Vibram sole will shift with just a slight shift. And once it's adhered even a little, it can't be removed unless all the adhesive is peeled off. So in the end, I did the work of peeling off the adhesive and painting it again. In particular, it took half a day to remove the adhesive.
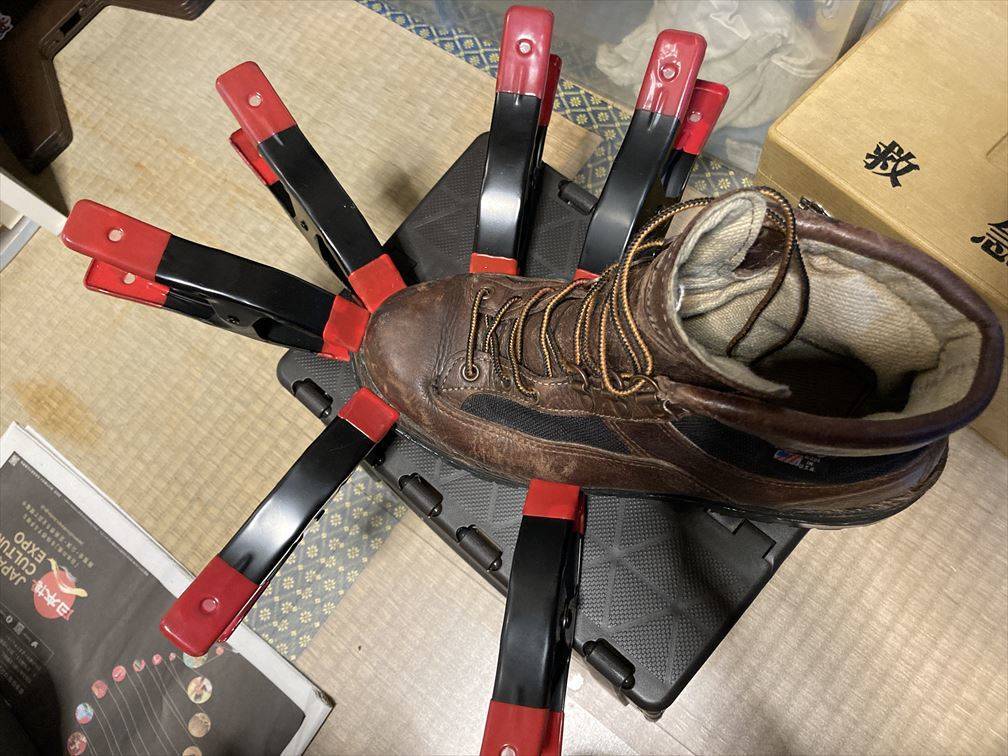
After bonding with diabond, crimp with a hammer. Clamp it and leave it for about 3 days.
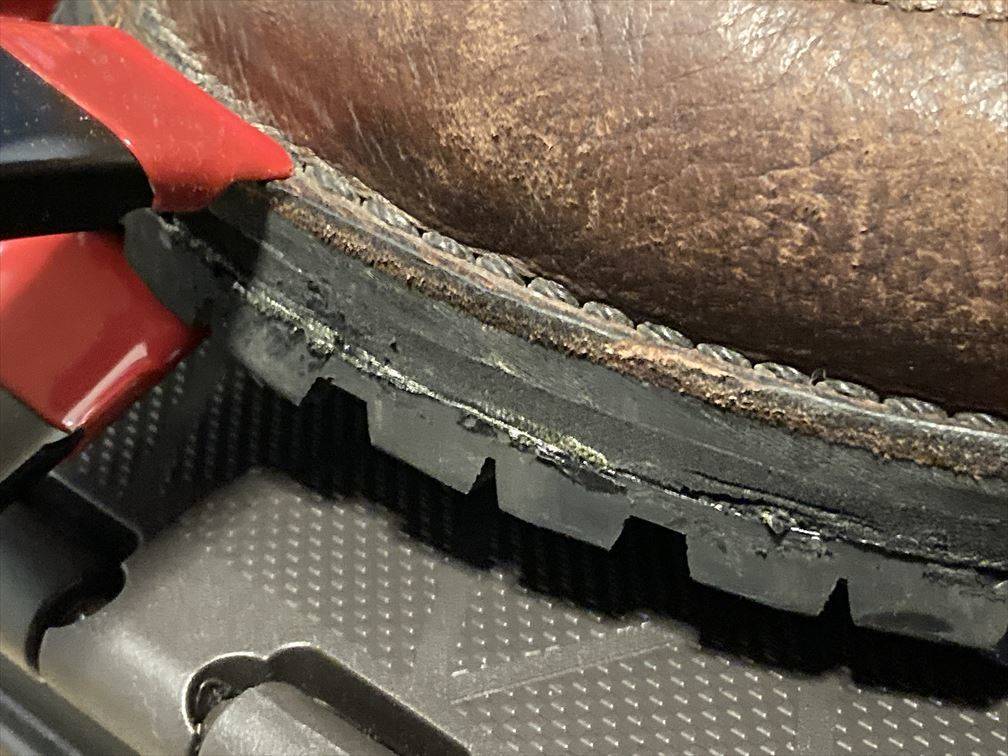
Because I scraped the midsole a little, there was a part where the groove was inevitable. I filled this place with shoogoo.
[Video] I tried to replace Danner's Vibram sole by myself!
Reference articles, reference videos
Danner Mountain Hood All Sole │ Shoe Repair Shop Nichiei's Blog
Sale of shoe repair materials Vibram soles
Danner - Men's shoe repair shop LABO|Osaka/Kobe/Amagasaki/Nishinomiya/Takarazuka/Ashiya
Focusing on the Danner midsole. |RECOMMEND
Danner Light How to repair only the heel of two pairs of boots without replacing all soles | apego
Subaru Online Shop / Rubber All Sole
Subaru Online Shop / VIBRAM Climbing Unit Sole #1136 8mm
Danner Resole Danner genuine sole replacement-YouTube
Battered "Red Wing" miraculous revival! ! Part 2-YouTube
Cut and paste the Vibram sole. ④ REDWING 8179 tea core model Red Wing - YouTube